Are you looking for ways to import and export WooCommerce orders?
WooCommerce has an import-import feature but it has limitations. You can only import products, not orders, and export products and orders in only XML files.
To import both products and orders and export them in other file formats like Google Sheets, you need a third-party plugin like WPSyncSheets For WooCommerce.
We have a separate article on how to import and export WooCommerce products. In this tutorial, we will show you how to use WPSyncSheets For WooCommerce to import and export WooCommece orders from your WooCommerce store into Google Sheets.
Let’s dive right in.
Benefits of Importing or Exporting WooCommerce Orders
Some common benefits of importing WooCommerce orders are:
- Bulk migrate large volumes of order data from any e-commerce platform to WooCommerce
- Bulk updating existing orders with new information like changes in order status, customer details, shipping information
- Reduce errors that can occur with manual data entry or updates
- For businesses that take orders through various channels (like phone or in-person), importing orders helps consolidate sales data in one place
- Importing a set of real or sample orders into a staging or development environment enables thorough testing under realistic conditions, etc
Common benefits of exporting WooCommerce orders are:
- Exporting order data helps in transitioning to a new e-commerce platform
- Facilitates insights into sales trends, seasonal patterns, product performance, and customer behavior allowing the generation of accurate financial reports
- Off-site backup of orders when the store is undergoing reconstruction and major modifications
- Regularly exporting orders provides a safeguard against data loss
- Many businesses need to send order data to external systems, such as accounting software, CRM platforms, dropshipping services, etc
How to Import & Export WooCommerce Orders
In the following steps, you will learn how to import and export WooCoommerce orders from your WooCommerce store into Google Sheets.
IMPORTANT: Before you start with the tutorial below, please back up your entire website as a precaution against data loss.
i. Install & Activate WPSyncSheets For WooCommerce Plugin
WPSyncSheets For WooCommerce is a powerful plugin built for WooCommerce stores.
The plugin is available in two different versions. You can export orders into Google Sheets using the free version of the plugin, but to import orders into your store, you need the premium version which comes at an annual fee of $59 for a single website.
We are using the premium plugin to demonstrate how to import and export orders in Google Sheets in the next few steps.
If you are only interested in exporting orders, then use the free plugin.
ii. Connect WPSyncSheets For WooCommerce With Google Drive
To import or export data from your WooCommerce store to Google Sheets, you need to connect the plugin to your Google Drive.
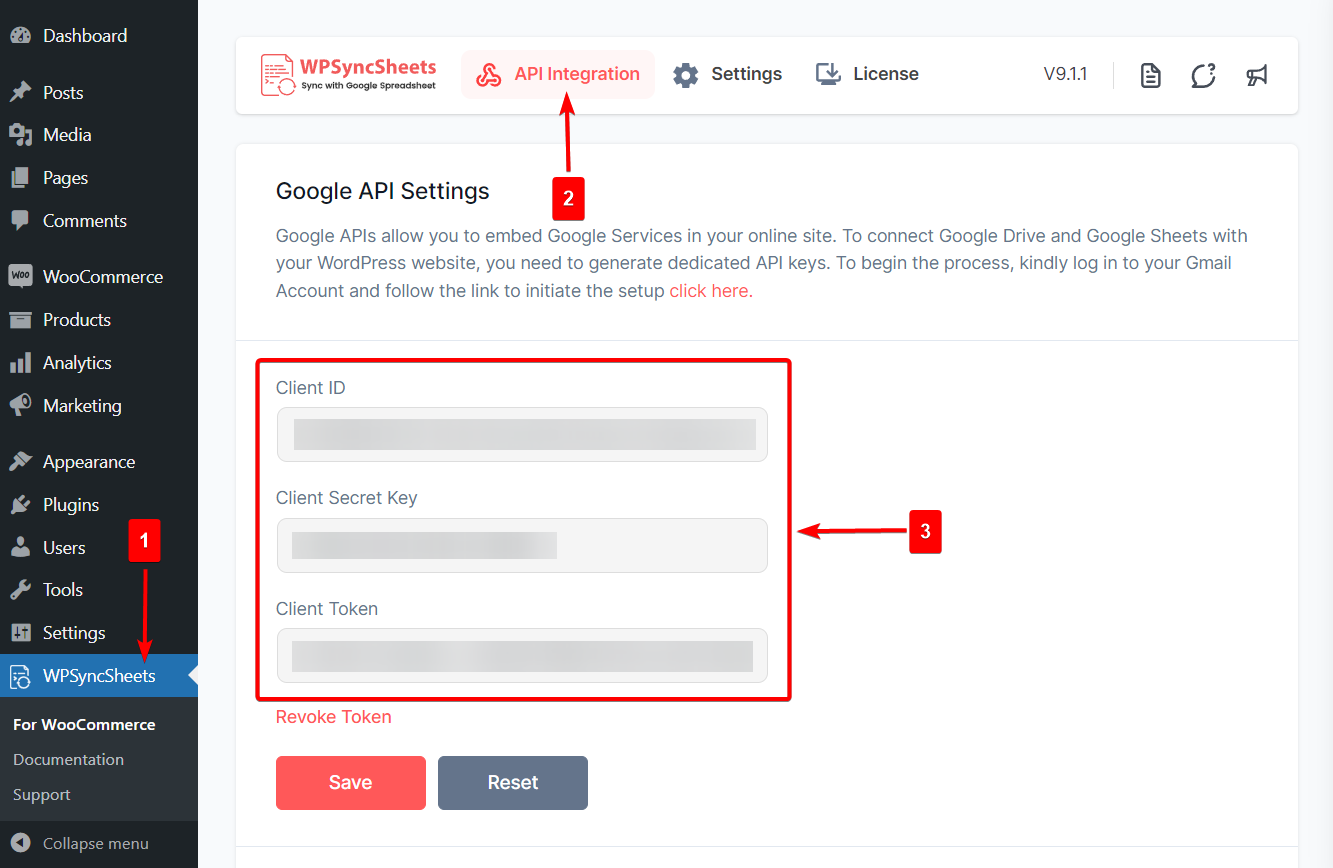
After installing the plugin, you should see a WPSyncSheets option in your WordPress dashboard menu. Select that and go to API Integration.
Here, you need to add a Client ID, Client Secret Key, and Client Token. These can be generated from your Google Console account.
We already have a separate guide on how to generate them. The process involves enabling Google Drive, Sheets APIs, and generating new credentials, i.e. client ID and secret keys. It’s a long tutorial but fairly easy to carry out.
After you have generated the information, add it to your website and hit the Save button.
iii. Import Orders From Google Sheets to WooCommerce Store
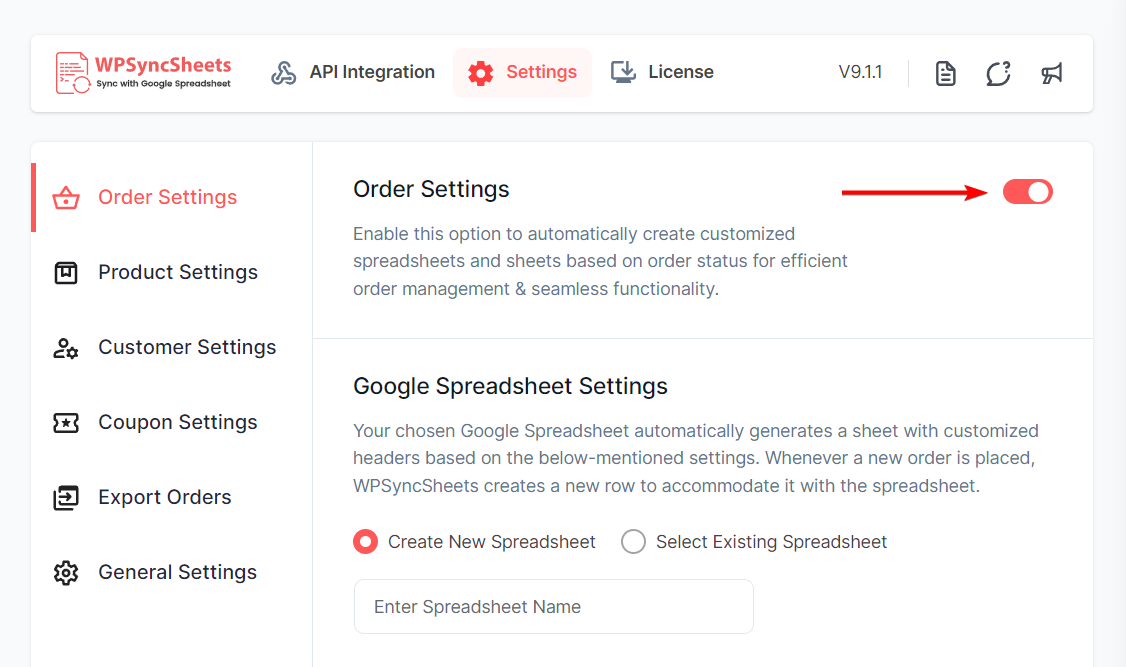
Go to the Order Settings tab and toggle on the Order Settings option.
IMPORTANT: You don’t have to create a Google Sheet from scratch. The WPSyncSheets For WooCommerce plugin provides a way to generate a template spreadsheet with the correct headers and format. You can update the spreadsheet before importing it to your website. But first, you need to prepare the template spreadsheet.
1. Prepare Google Sheets Template
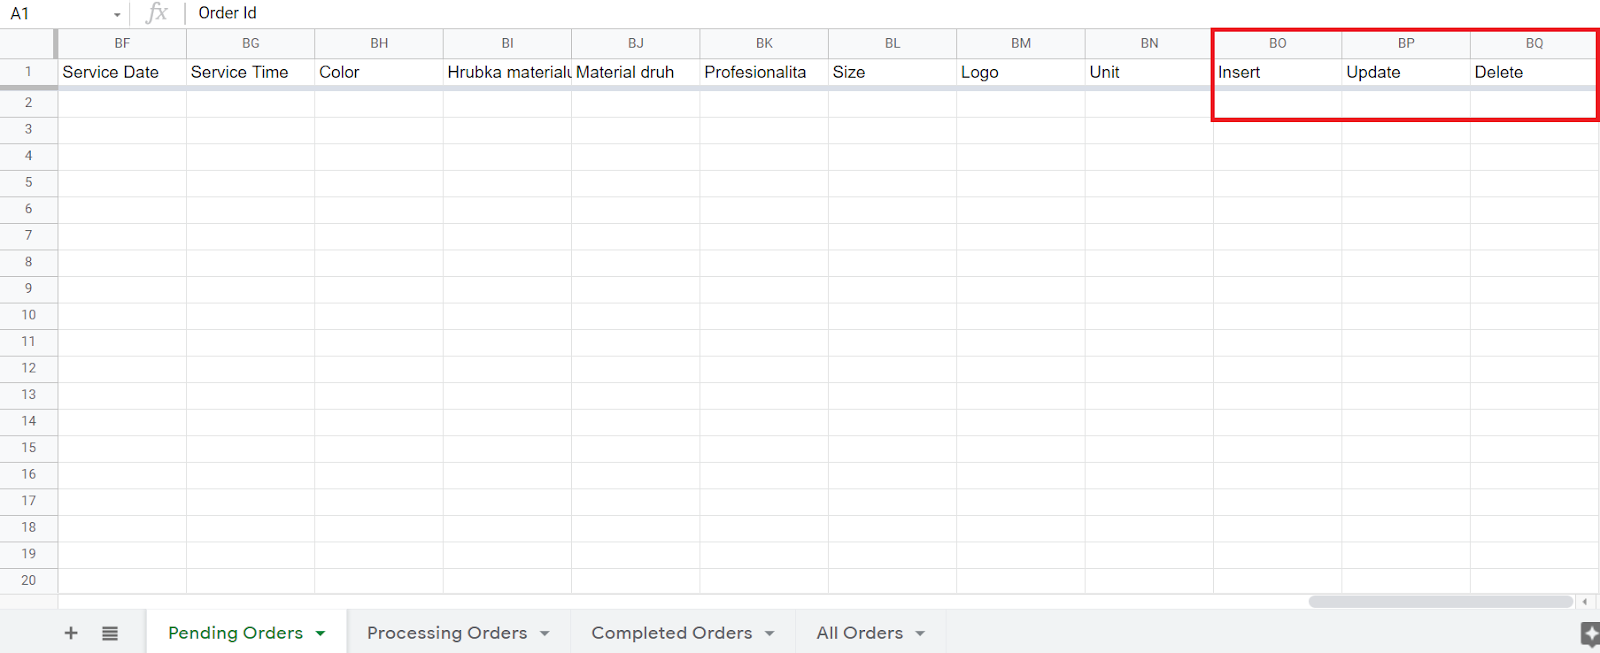
In Order Settings, scroll down to the Import Orders, toggle on the Insert Order, Update Order, and Delete Order options, and hit the Save button.
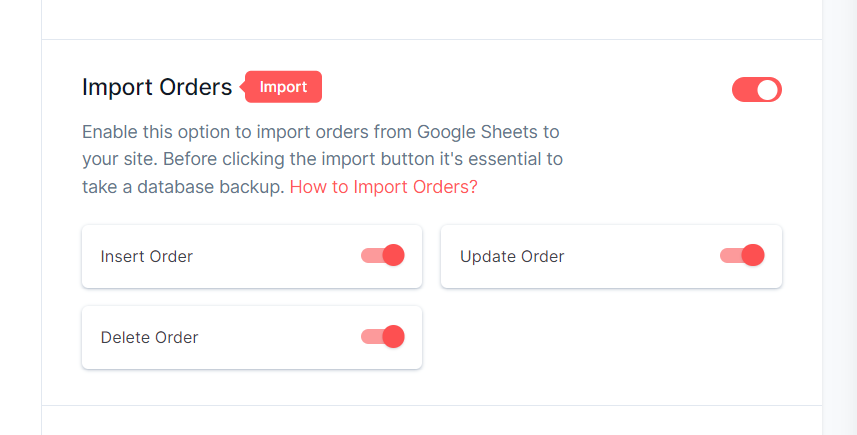
- Insert Order: This option allows you to add new orders to your store. When enabled, it adds a header to the template spreadsheet where you can create new orders. The column under this header will be used to import completely new orders that don’t already exist in your store.
- Update Order: This will be used when you want to modify information on orders already in your store.
- Delete Order: This will be used when you want to remove certain orders from your store entirely.
When you generate the spreadsheet later, the three headers will appear on the sheet allowing you to create, modify, and remove orders from your store.
We have covered how to create, modify, and remove orders in a later step.
2. Review Sheet Headers
Sheet Headers are predefined column titles that the plugin adds to your Google Sheet. The headers correspond to specific your store’s order data.

In the Import Orders setting page, scroll down to the Sheet Headers section and you should see the default sheet headers generated by the WPSyncSheets For WooCommerce plugin based on the order data of your WooCommerce store.
Most headers are toggled on by default. You can toggle off any of the headers you don’t want on your spreadsheet. Be sure to hit the Save button to ensure your modifications are saved.
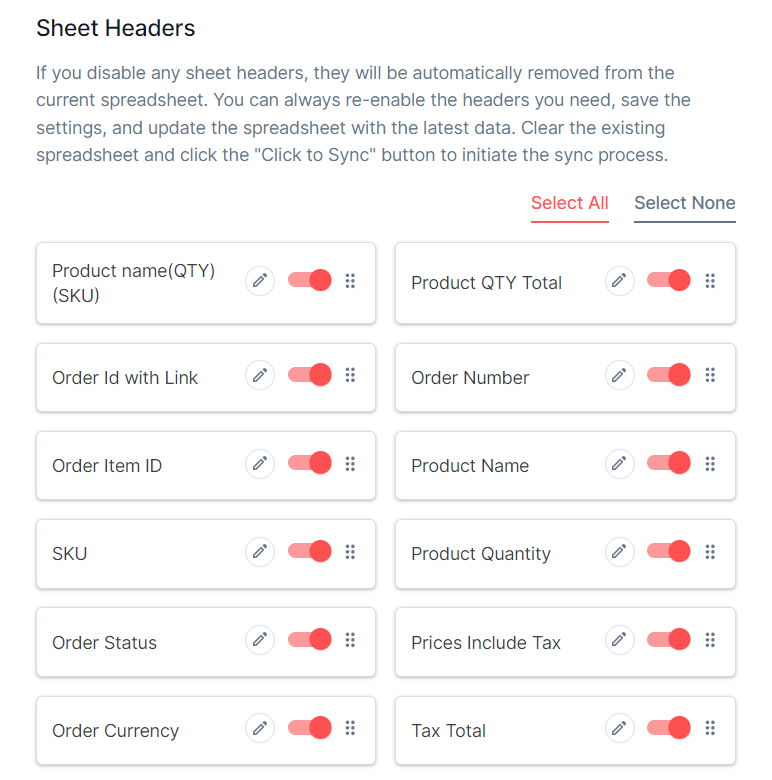
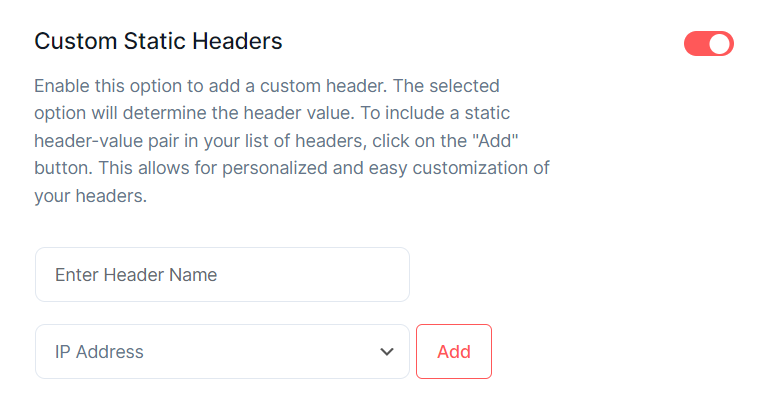
You can add custom headers to your spreadsheet from the Custom Static Headers section.
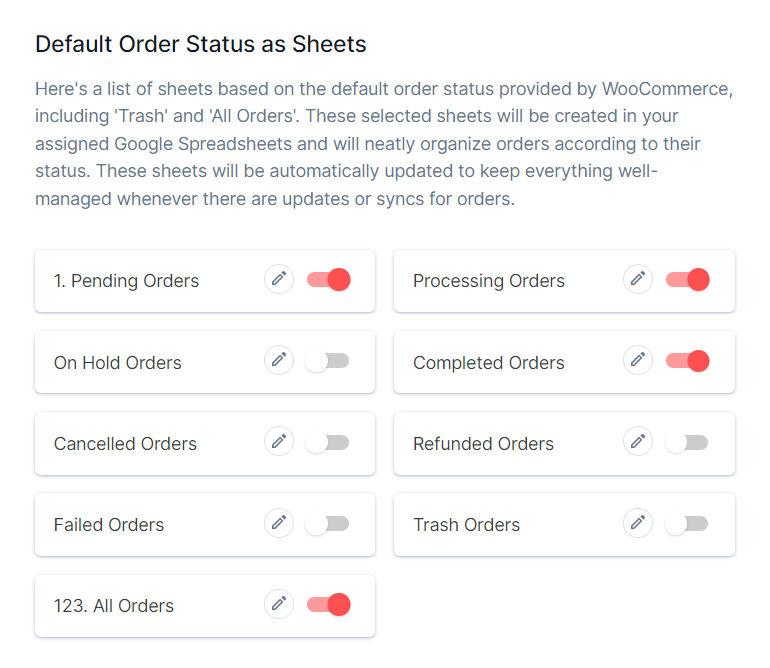
3. Review Order Status
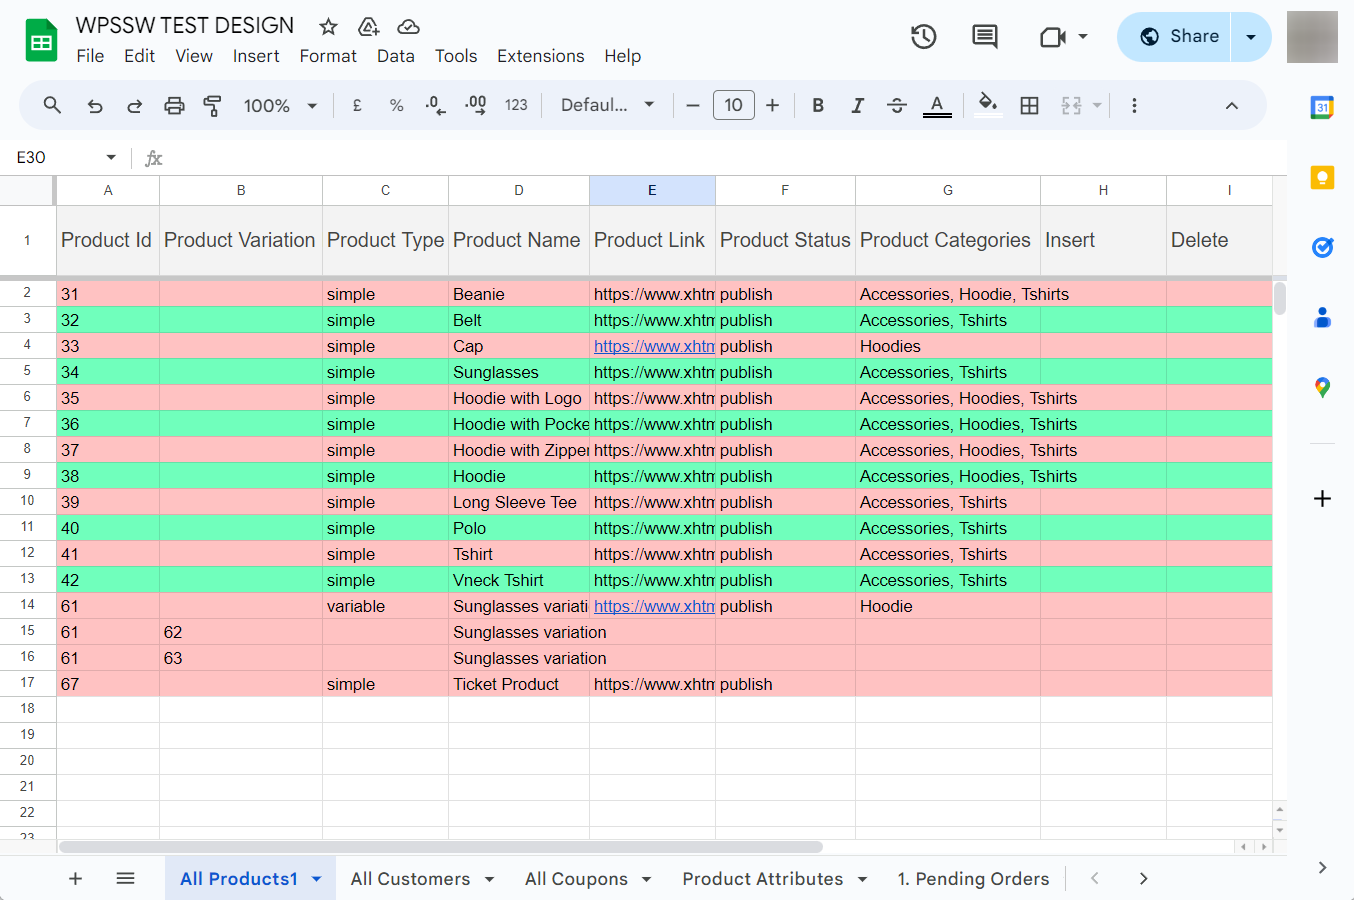
The Google Sheets template that you’ll generate in one of the later steps will contain several sheets. Each sheet will display the order statuses of different products in your store.

WPSyncSheets For WooCommerce automatically creates sheets based on the order status data available in your WooCommerce store.
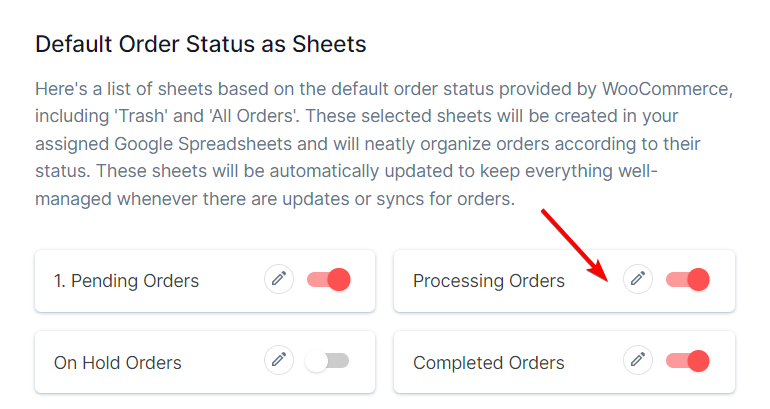
If you want to remove any order status data from the template spreadsheet, scroll down to the Default Order Status as Sheets and disable any of the default order statuses.
4. Review Other Order Settings Options
On the Order Settings page, there are plenty of other options that you may want to modify.
For instance, you may want to include order data based on selected product categories in the template spreadsheet.
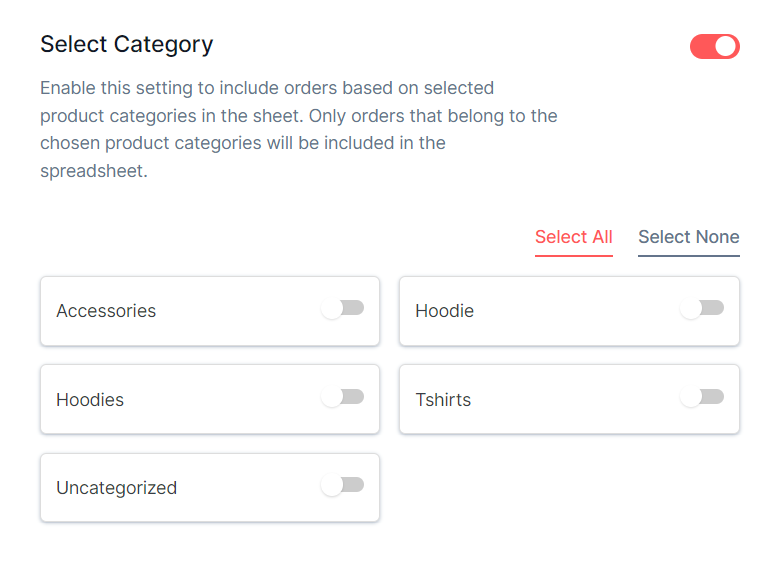
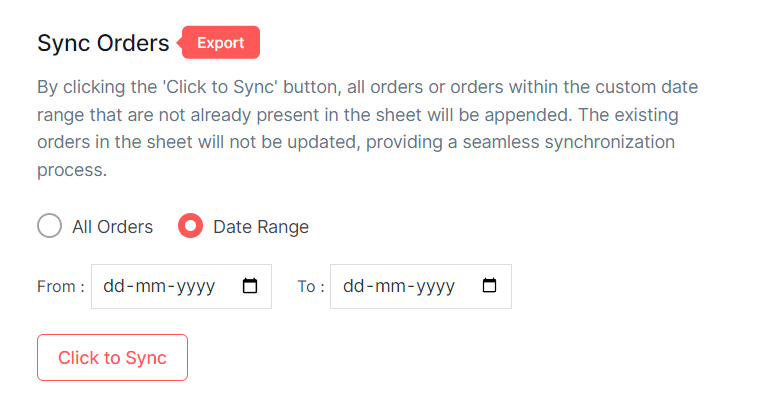
Or export order data from within the custom date range.
We recommend reviewing all the options and making modifications wherever necessary.
5. Generate & Preview the Google Sheets Template
Now, be sure to hit the Save button at the bottom of the Order Settings page before generating the Google Sheets template.
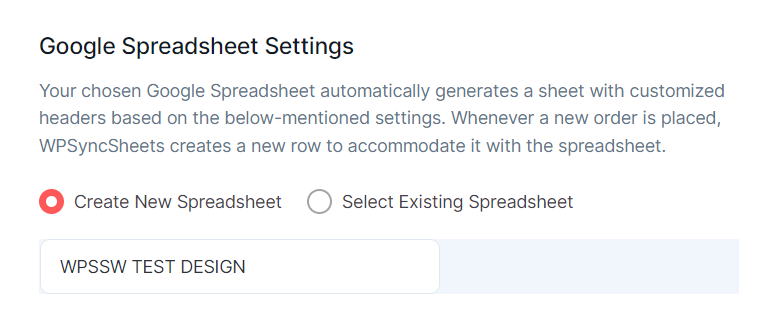
Go to the Google Spreadsheet Settings section and select the Create New Spreadsheet option.
Then enter a name and hit enter. A new spreadsheet will be created.
Next, choose the Select Existing Spreadsheet option, make sure the spreadsheet you just created is selected from the dropdown menu, and then hit the eye button which will allow you to preview the generated Google Sheets.
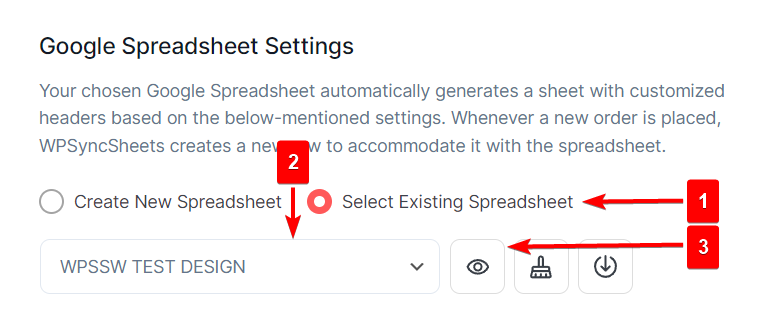
As soon as you hit the preview button, the Google Sheets template will open in a new tab.
6. Create, Modify, & Remove Orders on Google Sheets
Earlier, in step 1, we showed how to add the Insert, Update, and Delete columns to the template and we said that these columns are to be used to create orders, modify orders, and remove orders.
We already have a separate guide on how to create orders, modify orders, and remove orders from your store via a Google Sheet template you just downloaded. Please follow that.
7. Import Google Sheets to Your WooCommerce Store
After you’ve modified the Google Sheets template, it’s time to import it into your WooCommerce store.
This is easy.
Just go to Order Settings → Import Orders, hit the Import Order button and your modified Google Sheets will be imported into your WooCommerce store. Scroll down and hit the Save button.

iv. Export Orders From Google Sheets to WooCommerce Store
The steps to export your WooCommerce store order data into Google Sheets are almost similar to importing orders (covered in the previous section).
You can skip the first step, and proceed to review the sheet headers, order statuses, and all other order settings. Then generate and preview the Google Sheets.
You can share the sheet with others using the URL or hit the download button in the Google Spreadsheet Settings section to export the sheet to your local computer.
To reiterate, follow steps 2, 3, 4, and 5 then share or export the Sheet by using the URL or download button.

That’s it, folks. You now know how to import and export WooCommerce orders into Google Sheets.
Conclusion
There are several reasons why WooCommerce store owners would want to import or export order data.
While WooCommerce offers import-import features it comes with limitations like the inability to import orders and the inability to export orders in Google Sheets.
To overcome these limitations you need to rely on a third-party plugin like WPSyncSheets For WooCommerce.
The plugin is fairly easy to use and comes in both free and premium versions.
You can export order data using the free plugin but the premium version is required to import orders into your store.
Try WPSyncSheets For WooCommerce today!
FAQs
How to export processing orders in WooCommerce?
Processing orders in a WooCommerce store can be exported using the WPSyncSheets For WooCommerce plugin. It’s a premium plugin. You need to install and activate it on your store, then go to WPSyncSheets → For WooCommerce → Order Settings → Default Order Status as Sheet, and toggle on the Processing Orders option.
Then download the processing orders by selecting the Download button from under the Google Spreadsheet Settings section.
How to export WooCommerce orders for free?
You can export WooCommerce orders using the free version of the WPSyncSheets For WooCommerce plugin.
Install and activate the plugin, then go to WPSyncSheets → For WooCommerce → Order Settings → Google Spreadsheet Settings and select the Create New Spreadsheet option. Enter a name and hit enter. A new spreadsheet will be created.
Next, choose the Select Existing Spreadsheet option, make sure the spreadsheet you just created is selected from the dropdown menu, and then download WooCommerce orders by selecting the Download button from under the Google Spreadsheet Settings section.
What is the best order export plugin for WooCommerce?
The best order export plugin for WooCommerce is WPSyncSheets For WooCommerce. It’s a free plugin and allows you to export orders as well as products into Google Sheets. You can create as many Sheets as you want and easily edit orders from the admin area and it will be automatically reflected in the Sheets. The plugin is user-friendly, regularly updated, and offers great support and comprehensive documentation.


