

Are you looking for ways to import WordPress posts from Excel or .csv files?
Importing WordPress posts from Excel or .csv files allows you to carry out bulk import, reduce the risk of human error, move from one website to another, restore content from spreadsheet after data loss or site crash, bulk upload content, collaborate with team members on a spreadsheet before publishing, upload content from spreadsheet to quickly populate a staging website, among other things.
WordPress has a default import-export feature that allows you to import posts in .xml format.
You can’t use Excel sheets and .csv files to import posts using WordPress’ built-in feature which is why you need to rely on a third-party plugin like WPSyncSheets For WooCommerce.
In this article, we are going to show you how to use our WPSyncSheets For Core plugin to import posts from Excel and .csv files.
Let’s get started with the tutorial.
How to Import Posts From Excel & .csv Files
To import posts from Excel and .csv files, you need the WPSyncSheets For Core plugin. It’s a premium plugin that comes at an annual cost of $49 for a single website license.
You need to purchase the plugin before proceeding with the tutorial below.
Also, it’s super IMPORTANT to understand how the plugin works. The WPSyncSheets For Core plugin works with Google Sheets, meaning it imports and exports posts using Google Sheets.
So in the following tutorial, we will show you how to :
- Generate a Google Sheets template using the plugin
- Download the template in .csv format
- Open the template in Excel
- Add posts to the template spreadsheet
- Upload the spreadsheet into the Google Sheets generated by the plugin
- Return to the plugin setting page and “Click to Sync” button to import the posts
This is how Google Sheets and the WPsyncSheets plugin will help you upload posts from Excel or .csv files.
1. Install & Activate WPSyncSheets For Core
Start by installing and activating the purchased plugin on your WordPress website.
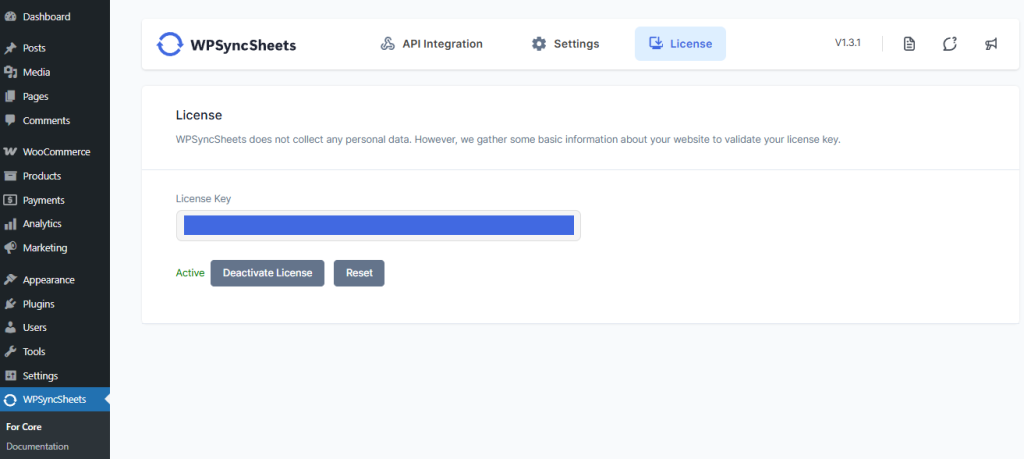
Next, find your unique license from your WPSyncSheets account or the welcome email you received upon purchasing the plugin, and then add it to your website to activate the license. Go to WPSyncSheets → For Core → License.
2. Connect Website With GDrive
As we said earlier WPSyncSheets works with Google Sheets and you will be generating a Google Sheets template before downloading it into a .csv file.
The spreadsheet will be generated in your GDrive.
To let the plugin generate a Google Sheet into your GDrive account, you need to connect your website to your GDrive account so that the plugin has access to your account.
Don’t worry, this is not a violation of privacy. In fact, the connection between your website and GDrive will be made via trusted Google API integration.
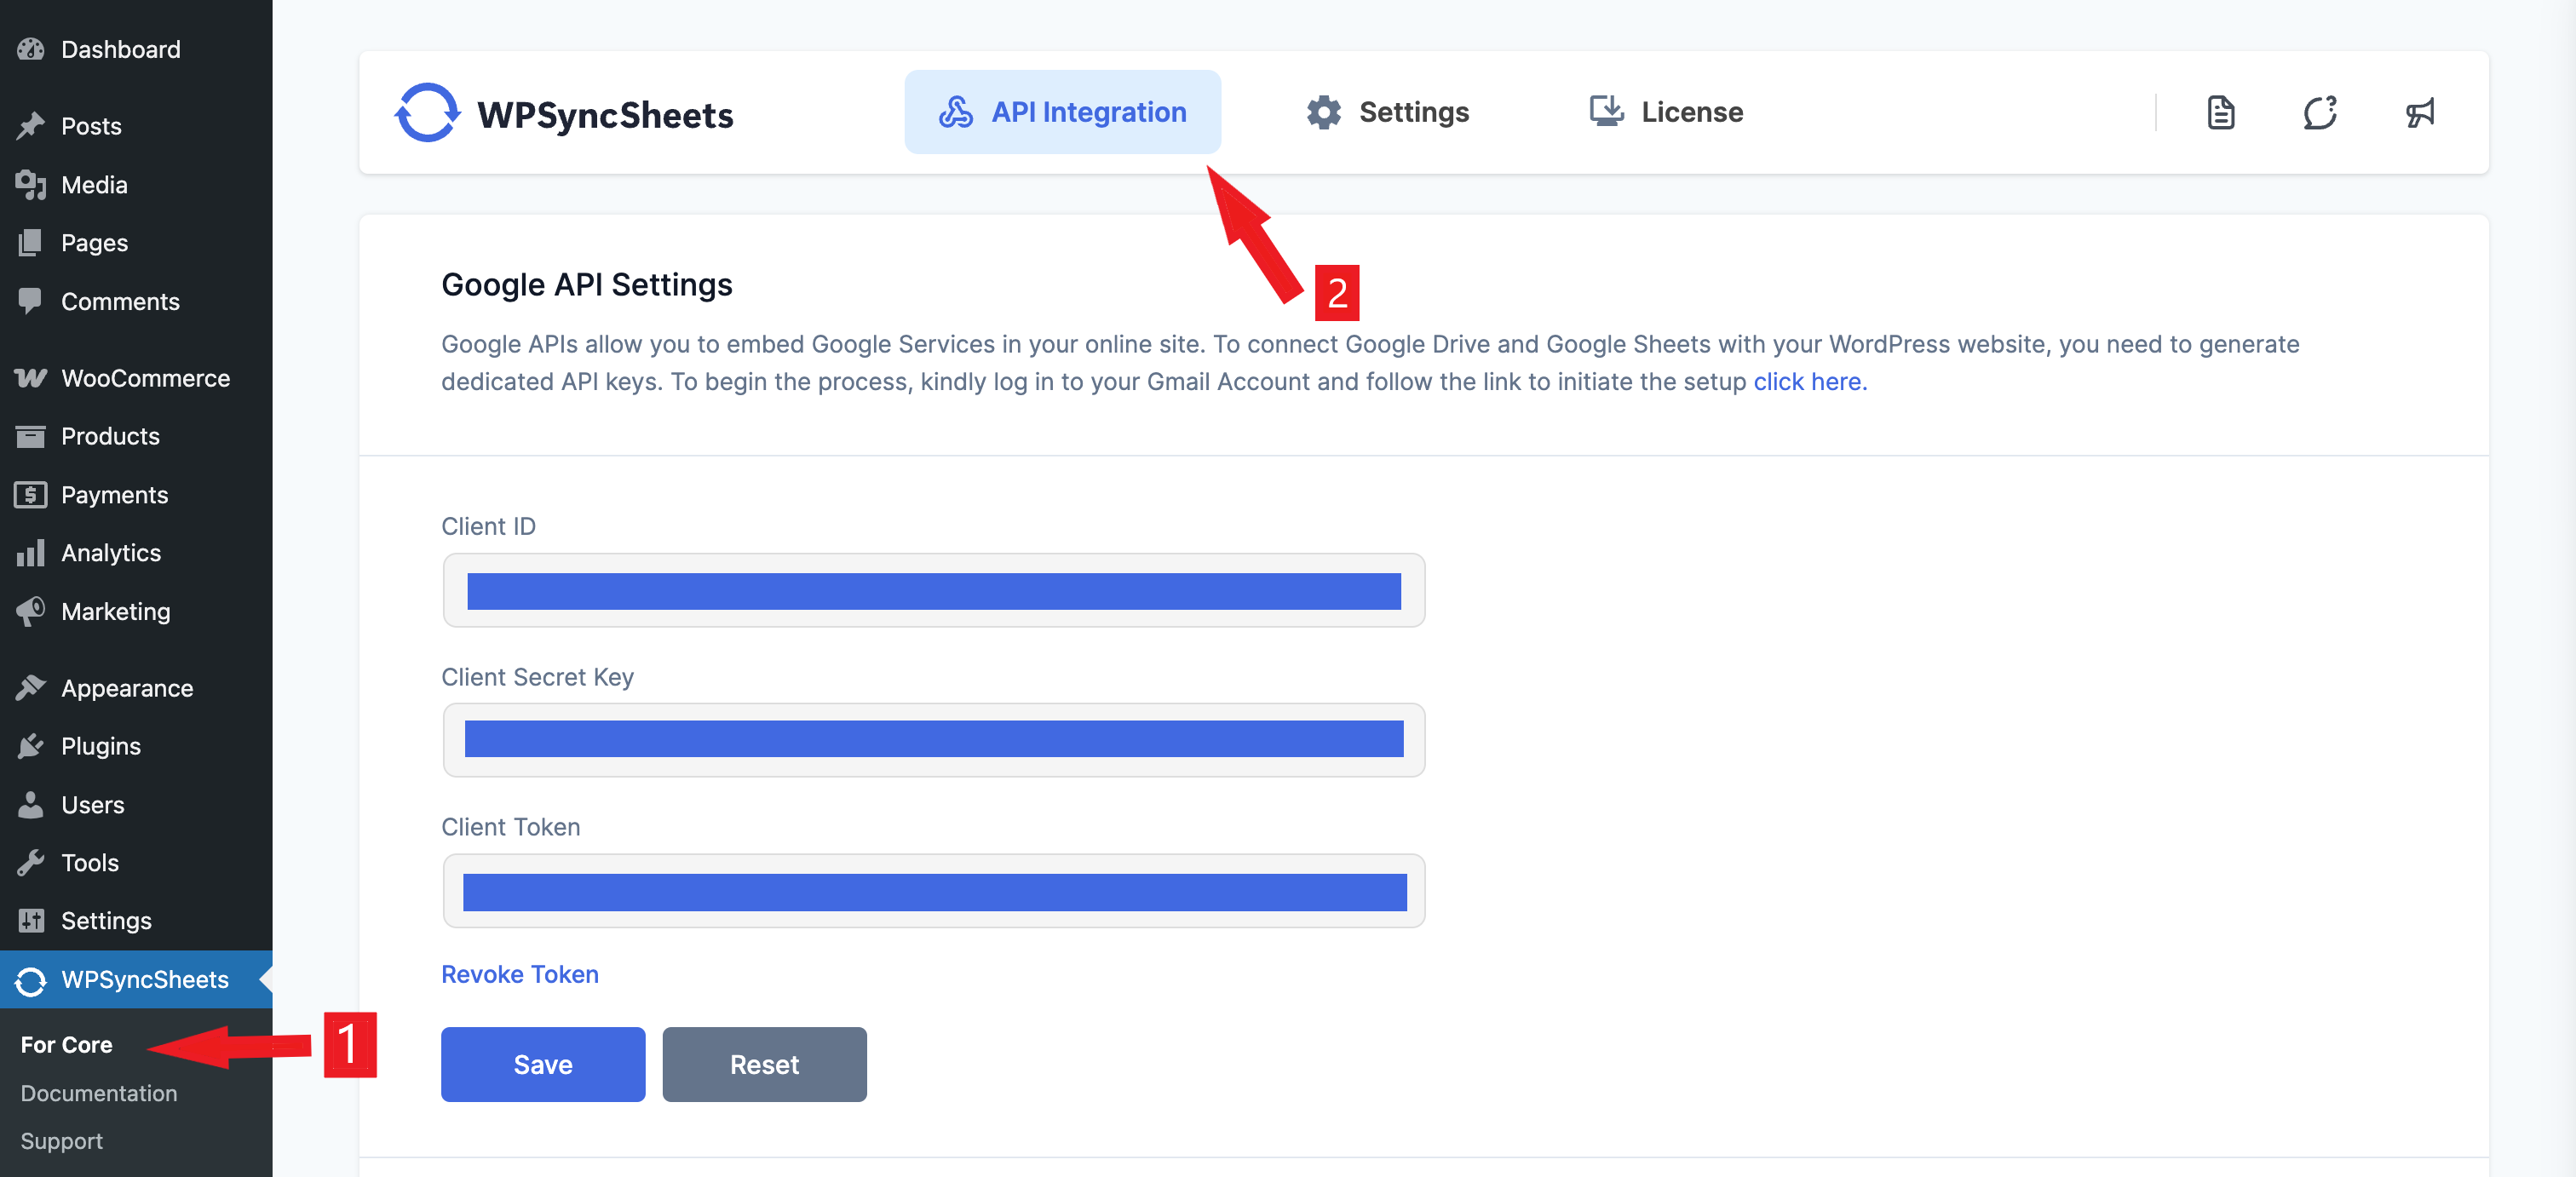
On your WordPress dashboard, go to WPSyncSheets → For Core → API Integration. You will see that the plugin needs a Client ID, Secret Key, and Token to be able to connect with your GDrive. These have to be generated from your Google Clouds Platform.
We have a separate guide on how to do just that. Kindly follow that and once you have the ID, Secret Key, and Token, return to your website and add them to the Google API Settings page.
That will immediately connect your website with GDrive.
3. Generate a Google Sheets Template
Go to WPSyncSheets → For Core → Posts Settings, and toggle on the Post Settings button.
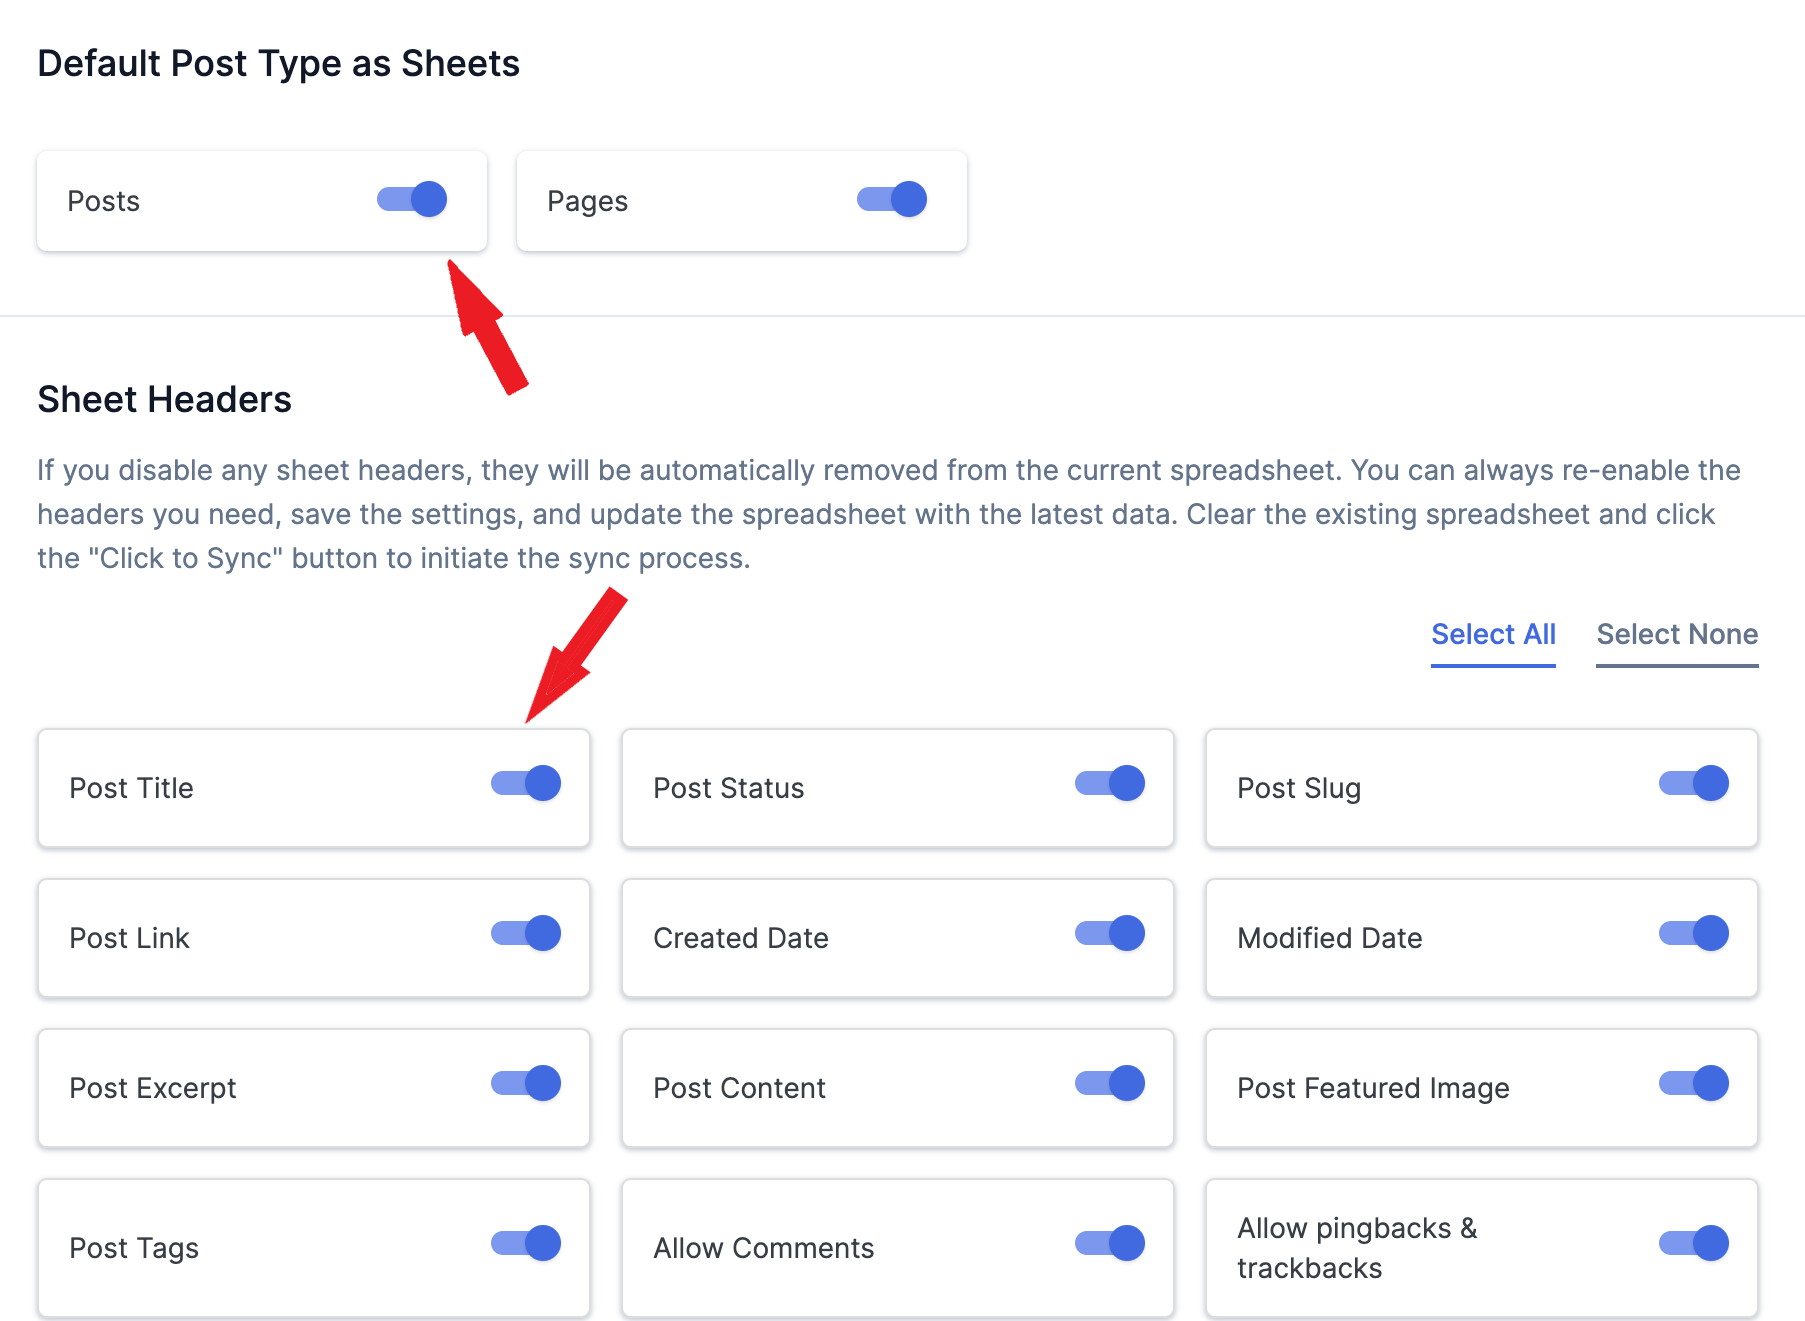
Next, go to Default Post Type as Sheets and toggle on the Posts option.
Then, proceed to the Sheet Headers section, where you can see the names of the individual sheets in the Google Sheets you will soon be exporting. We recommend taking a good look at this section and then enabling or disabling the headers as per your requirement.
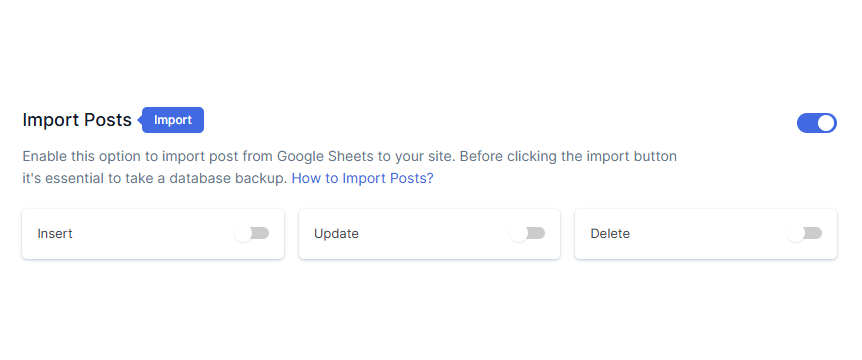
Next, go to the Import Posts section and toggle on the option. Then toggle on the Insert, Update, and Delete options. This is a SUPER IMPORTANT step.
When that’s done, it’s time to generate a Google Sheet where your existing posts will be exported. Even if you don’t have any posts published on your website, you need to follow the steps below because the goal is to generate a Google Sheet template that can be used to import posts.
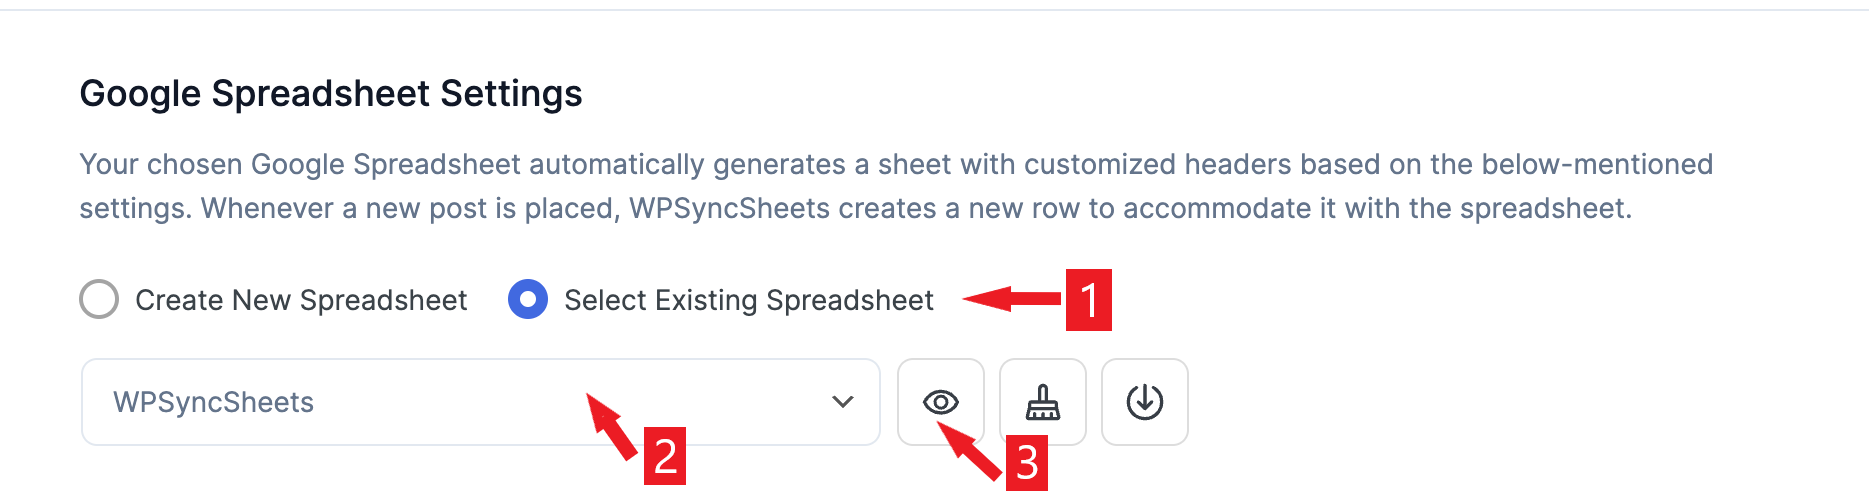
So go to the Google Spreadsheet Settings section, select the Create New Spreadsheet option, add a name, and hit enter.
Then select the Select Existing Spreadsheets option, choose the spreadsheet you just created from the dropdown menu, and hit the eye button to open the spreadsheet in a new tab.
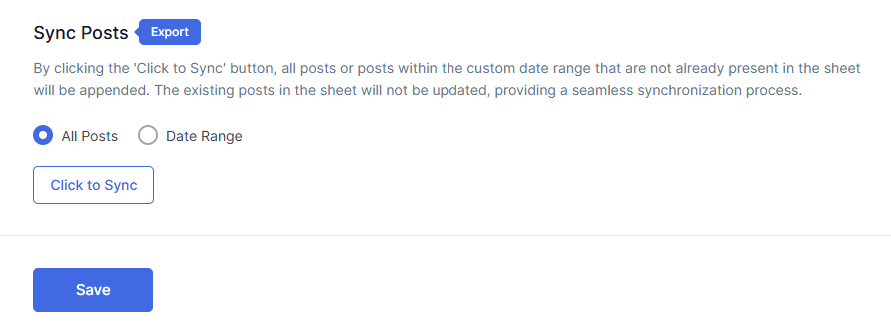
If you see that the posts were not properly exported, go to Sync Posts and select All Posts or Date Range, depending on whether you want to export every post or post published within a time frame.
Hit the Click to Sync button, the plugin will sync all post data between the Google Sheet and your website. Save your settings and then view the Google Sheets.
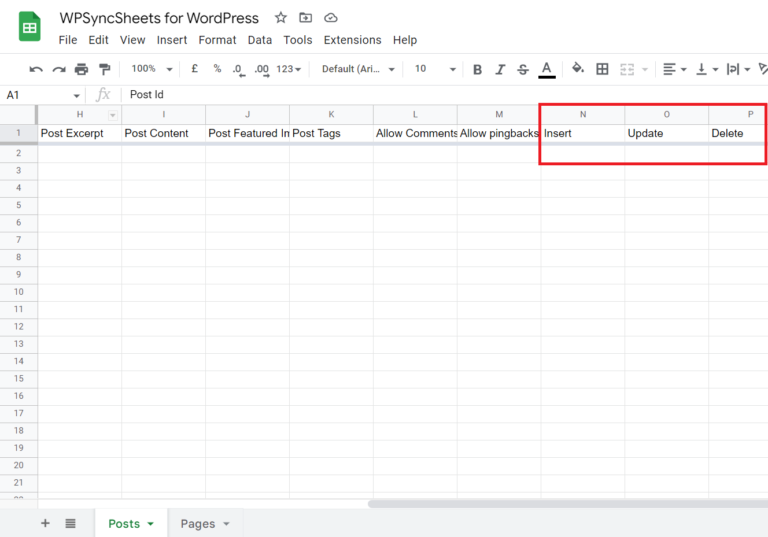
Here’s how the exported Google Sheet would look:
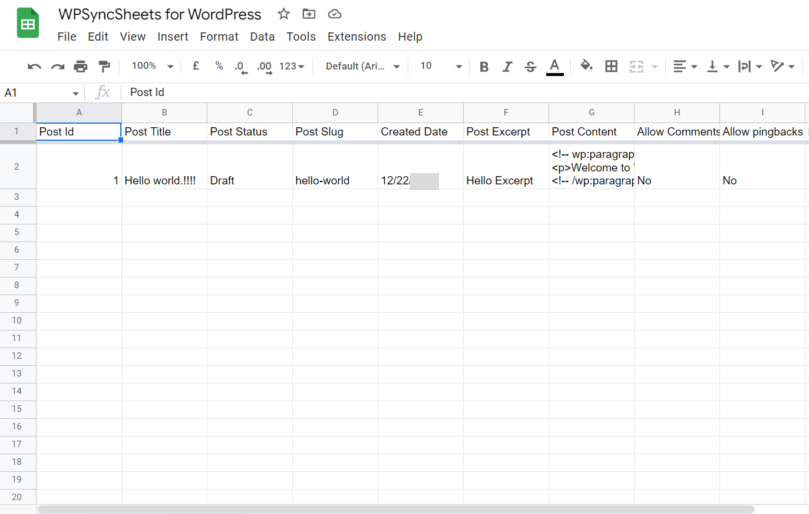
Make sure that the Add, Update, and Delete columns are present on the spreadsheet.
4. Download Google Sheets Template in .csv Format
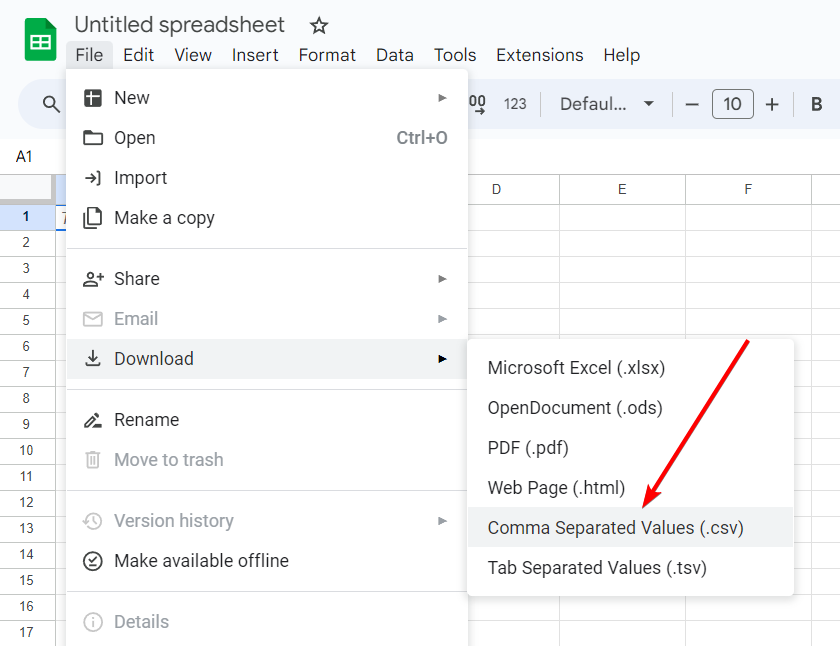
On the Google Sheets template, go to File → Download → Comma Separated Values (.csv) and the template will be downloaded to your local computer.
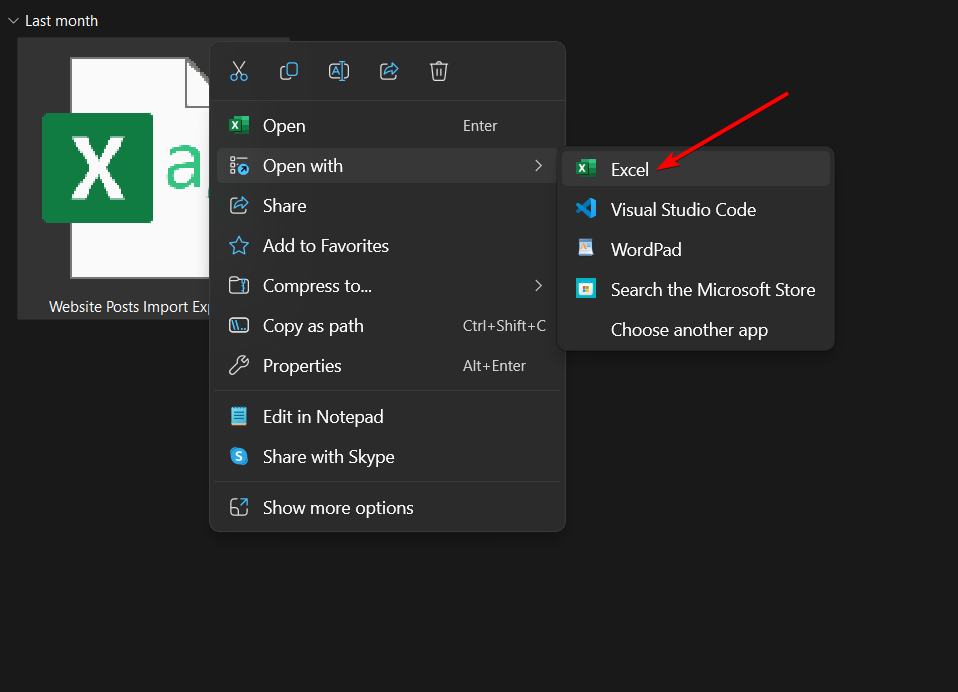
5. Open Template in Excel & Add Posts to Template Spreadsheet
The .csv files you just downloaded into your local computer, open in Microsoft Excel.
Next, add new posts in the “Add” column.
You can even update existing posts using the “Update” column and delete posts using the “Delete” column.
Here’s a guide on how to add, update, and delete posts. It’s written for Google Sheets users but the steps can be applied to your .csv file as well.
Don’t change any of the default columns because that might create problems when uploading the posts to your WordPress website.
Save the modifications and close the Google Sheets.
6. Upload Template Into Google Sheets Generated in Step 3
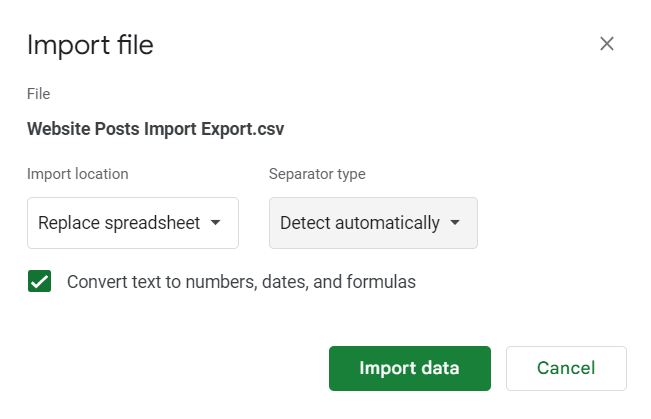
Go to the Google Sheets template that you generated and upload the .csv file that you modified in the previous step. Navigate to File → Import and upload the .csv file and then, under Import Location, select Replace Spreadsheet, and under Separator Type select Detect Automatically.
7. Import Posts From Google Sheets Template
Now, to import the new posts from your Google Sheets template, go to the Post Settings → Sync Posts and hit the Click to Sync button. It syncs the website and the template birectionally, meaning the posts available on your websites are available on the spreadsheet and vice versa.

By now the new posts should be uploaded on your website. Check by navigating to Posts → All Posts.
That’s it, folks! Now you know how to import posts into WordPress from Excel or .csv files.
Conclusion
Importing posts into WordPress websites from Excel or .csv is a great way to bulk migrate posts from one website to another, restore posts in case of data loss, and upload posts on a staging environment, among other things.
Unfortunately, WordPress’s default import-export tool does not allow importing posts from Excel or .csv file formats. So you need a third-party plugin like WPSyncSheets For Core to do that.
The plugin is built for importing and exporting posts and pages to and from your WordPress website. It’s fairly easy to use and there’s a great support team to help you out if you require assistance.
Try out WPSyncSheets For Core today!
That’s all folks! If you have any questions about ‘WordPress import posts from Excel or .csv,’ let us know in the comment section below.
Frequently Asked Questions (FAQs)
How to bulk import posts into WordPress?
Although WordPress has an import-export feature, it does not allow the import of posts using that feature. To bulk import posts into WordPress, you need a third-party plugin like WPSyncSheets For Core.
All you need to do is install and activate the plugin, go to WPSyncSheets → For Core → Post Settings, review the options available and make changes wherever necessary, then go to the Import Posts option and toggle on the Add, Update and Delete option, generate a new Google Sheets from the Google Spreadsheet Settings, open the Google Sheets using the “eye” button.
Now you will use the “Add” column in the Google Sheets to add new posts to the Google Sheets and on the plugin setting page, hit the Click to Sync button to import the posts into your website. Read more: Import Export WordPress Posts.
How to import an Excel file into WordPress without plugins?
You cannot import an Excel file into WordPress using a plugin because, in the context of importing posts, WordPress’ default import-export feature allows import of posts only in the .xml file format. You will need to convert the Excel file into a .xml file to be able to upload to the website. You can alternatively use a plugin like WPSyncSheets For Core to upload the Excel file into Google Sheets and then import the posts from Google Sheets into the website. Read: Import Export WordPress Posts.
How to publish data from Excel to a website?
Data from an Excel sheet can be published on a WordPress website using a plugin like WPSyncSheets For Core because WordPress’ default import-export feature allows the import of posts only in the .xml file format. The WPSyncSheets plugin works only with Google Sheets. So you can upload the Excel file into Google Sheets and then import the posts from Google Sheets into the website. Read: Import Export WordPress Posts.


