Are you looking for ways to import export pages in WordPress?
Export-import of WordPress pages allows migration of content between platforms, creation of backups, offline collaborations, and content audits, among other things.
While WordPress offers a free import-export feature out of the box, it works with only .xml files.
To import and export pages to a spreadsheet you need to rely on a 3rd party tool like WPSyncSheets For Core.
In this article, we will show you how to use the default WordPress import-export feature as well as the WPSyncSheets For Core plugin which works with Google Sheets and .xlsx files.
Let’s dive in.
Reasons to Import Export Pages in WordPress
Common reasons to import pages from a WordPress website:
- Transferring content when moving to a different WordPress website ensures a seamless transition without manual intervention
- In case of data loss, importing pages allows quick restoration of original data
- Importing data from a live website to a staging website allows for risk-free updates, changes, and experiments
- Businesses with multiple related websites can import relevant content without having to duplicate efforts across each website, and more
Common reasons for exporting existing pages from a WordPress website:
- Bulk export allows you to transfer large amounts of content simultaneously, saving considerable time and effort
- Regular exports can be used as a backup safety net, preserving your content in case of data loss, hacking, or site crashes
- Exporting enables teams to work on content updates or revisions locally, without affecting or risking the live site
- Exported pages can be reformatted and used in other media, such as ebooks, presentations, social media posts, etc
- When retiring a website, exporting preserves its content for future reference or potential reuse, and more
Import Export Pages in WordPress (Step-by-Step Guide)
There are two ways to import and export pages in WordPress.
- You can use the default WordPress import-export feature and import-export pages in .xml format.
- Or you can use the WPSyncSheets For Core plugin to import-export pages in Google Sheets and .xlsx format.
Using Default WordPress Import-Export Feature
To import pages into your WordPress website you need to add the pages in an .xml file.
Import
Then upload the file to your website by opening your WordPress dashboard and navigating to Tools → Import → WordPress → Install Now.
Then proceed to upload the file by selecting the Choose File button and hitting the Upload File & Import button. And that’s it!
Export
To export pages out of your WordPress website, go to Tools Export, select Pages under Choose What to Export, and hit the Download Export File button.
Using WPSyncSheets For Core Plugin
WPSyncSheets For Core is a paid plugin that helps import and export posts and pages between your WordPress website and Google Sheets.
You can add new pages, and update, and delete existing pages and custom post types using the ‘Click to Sync’ button.
The Google Sheets is entirely customizable which means you can add, edit, delete, or reorder columns, freeze headers, generate unlimited Google Sheets, view, clear, or download them in .xlsx, and a lot more.
In this section, we will show you how to import WordPress pages from Google Sheets and how to export pages into both Google Sheets and .xlsx file formats using the WPSyncSheets For Core plugin.
Let’s get started.
Export
Purchase, install, and activate the WPSyncSheets For Core plugin on your WordPress website, and then go to WPSyncSheets → Licence and add your unique license key to activate your account.
Then go to API Integration and proceed to connect your website with your Google Drive.
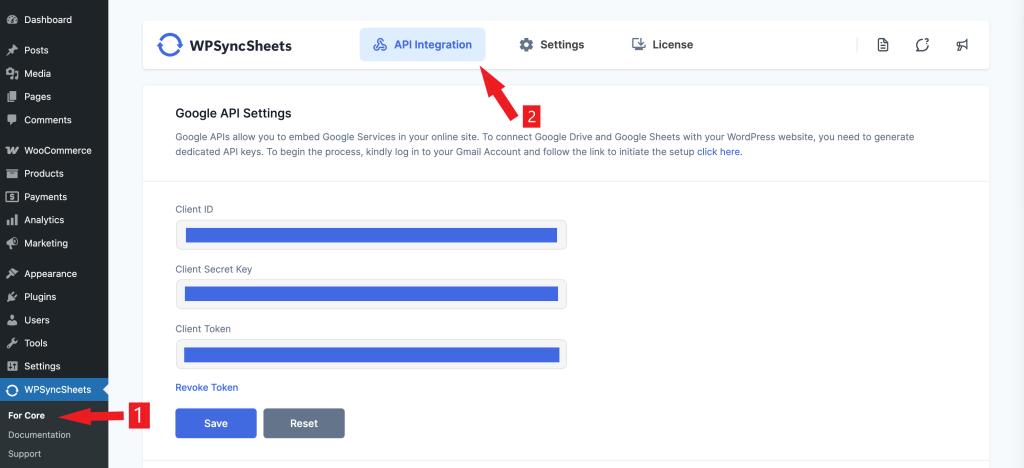
Next, go to Post Settings and enable toggle on the Post Settings option.
Immediately numerous options will appear.
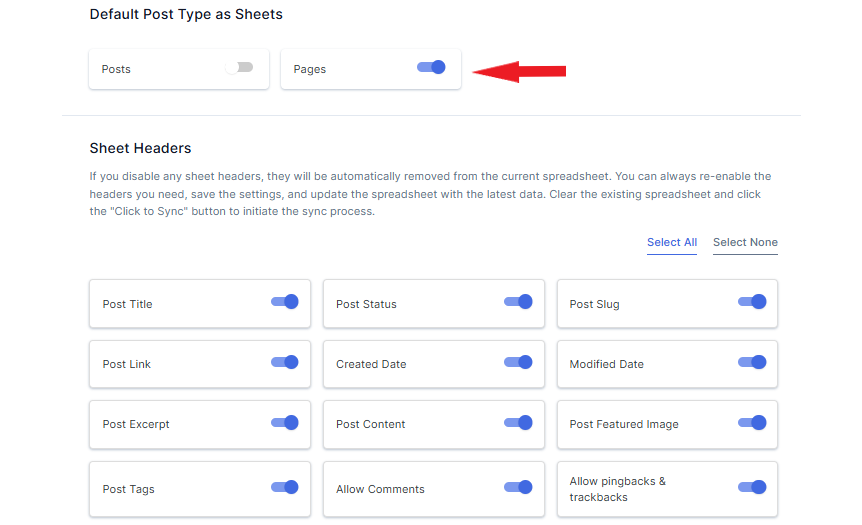
Scroll down to the Default Post Type as Sheets section and toggle on the Pages option.
Below that is the Sheet Headers section, which contains the names of individual sheets in the Google Sheets that you are about to generate and export. You can enable or disable any Sheet Headers you don’t want to export.
Scroll down and hit the Save button to save your settings so far.
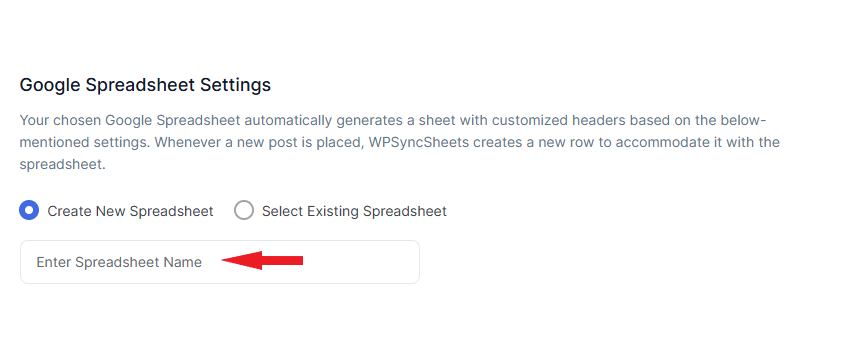
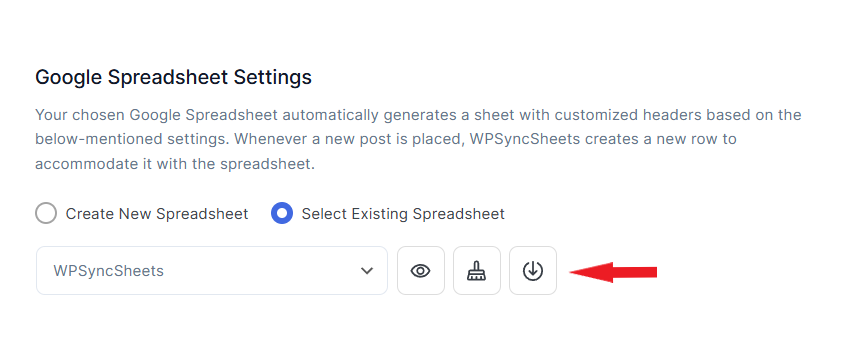
Now, scroll up to the Google Spreadsheet Settings section, select the Create New Spreadsheet option, and enter a name for the Google Sheets you are about the generate. Hit enter to generate the spreadsheet.
Choose the Select Existing Spreadsheet option and select the Google Sheets you just generated from the dropdown menu.
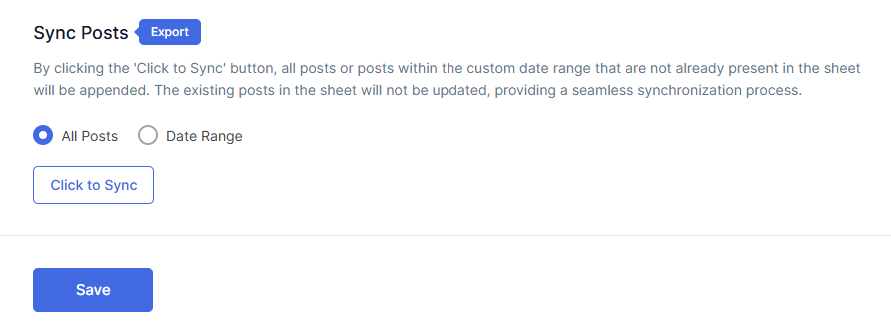
Next, scroll down to the Sync Posts, select All Posts or Date Range, if you want to export pages within a custom date range, and hit the Click to Sync button. This will export your website pages to the sheet.
Hit the Save button to save your settings.
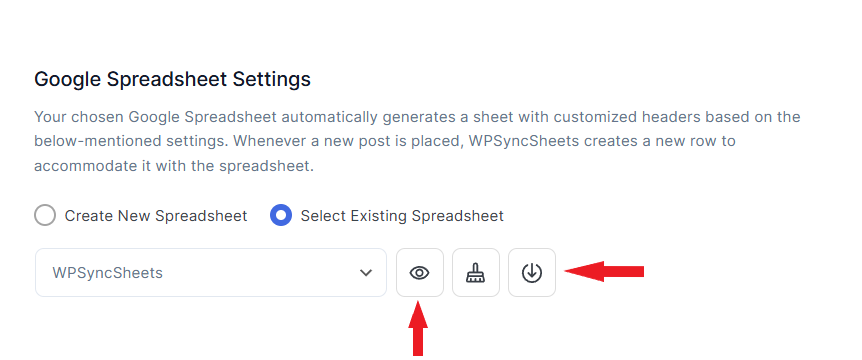
View your exported pages in Google Sheets by using the eye button or the download button to download the spreadsheet in .xlsx file format.
Here’s how the exported pages look on your Google Sheets:
Import
To import pages you first need to export the pages in Google Sheets following the steps listed in the previous section. Then you will add, modify, or delete pages in the spreadsheets which will be synced/imported into your WordPress website.
After you have exported the pages in the Google Sheets, open the spreadsheet in a new tab.
Then return to the WPSyncSheets Post Settings page and toggle on the Import Posts option. Proceed to toggle on the Insert, Update, and Delete options.
These columns will be added to the spreadsheet and you will use these columns to add, update, or delete existing pages of your WordPress website.
To add a new page, go to the Insert column, add 1, and add relevant data in the adjacent row. Next, go to the Post Settings page and you should be able to see a notification saying that a post needs to be imported to the website. Hit the Proceed button to start the import.

To update a page, add 1 to the Update column and then update the content in the row. To delete a page, just add 1 in the Delete column adjacent to the page row.
For more assistance, use this help doc: How to Import Pages.
That’s it. Now you know how to import export pages in a WordPress website.
Conclusion
Importing and exporting pages in WordPress serve purposes such as content transfer between sites, data backup, and restoration, risk-free testing on staging sites, content repurposing, content sharing across related websites, and a lot more.
You can use WordPress’ default import-export feature to migrate pages in .xml file formats. Or use the powerful WPSyncSheets For Core plugin to migrate pages in Google Sheets or .xlsx file formats.
If you have any questions about ‘import export pages WordPress,’ let us know in the comment section below.
FAQs
Can you transfer pages from one WordPress site to another?
You can transfer pages from one WordPress site to another by using WordPress’ default import-export feature or the powerful WPSyncSheets For Core plugin. The former allows migration in .xml file formats and the latter in Google Sheets or .xlsx file formats.
How to download a page from WordPress?
To download a page, you can use WordPress’ default import-export feature or the powerful WPSyncSheets For Core plugin. The former will download all pages from your website in .xml file formats and the latter in Google Sheets or .xlsx file formats.
How to transfer pages from WooCommerce?To transfer pages from WooCommerce, you need to first export them out of your website by using WordPress’ default import-export feature or the powerful WPSyncSheets For Core plugin. After exporting the pages, import them into your WooCommerce store by using any of the two tools we just mentioned.


