Are you looking for ways to import export WooCommerce products?
WooCommerce has a default feature that allows the import and export of store products in CSV and XML files.
While the import and export of products to CSV and XML files are useful to store owners, many of our customers want to import and export to Google Sheets.
So in this article, we are going to show you how to
- Migrate products in and out of your store in CSV and XML files using the default WooCommerce import-export feature
- And how to migrate products in Google Sheets using our powerful WPSyncSheets For WooCommerce plugin
Let’s dive in.
Why Import or Export WooCommerce Products
Common benefits of importing products into WooCommerce store are:
- Bulk import reduces the time and effort required to add products to the store
- Importing allows bulk updates of existing product information, such as prices, descriptions, product images, and much more
- By Importing products you can quickly restoration product catalog in case of data loss or corruption
- Products when imported into staging environments allow testing of a store under realistic conditions
- In response to sudden high market demands, store owners can quickly bulk import new products to the store, and much more
Common benefits of importing products from WooCommerce store are:
- Bulk export helps migrate the store to a new website or CMS
- Exporting allows for bulk editing of product information in a spreadsheet which can later be uploaded to the store facilitating bulk updates of product information
- Regularly exporting product data safeguarded against data loss due to website crashes
- Store owners can analyze exported product data to gain insights into sales trends, stock levels, and product performance
- Share accurate and up-to-date product lists with suppliers or partners, improving collaboration and supply chain processes, and much more
Import Export WooCommerce Products in CSV & XML
Import Products in CSV File
To import products using the default WooCommerce import-export feature you need to take the following steps:
1. Prepare CSV File
Download a CSV file with sample data from GitHub and replace the sample data with information for your own products.
Or products in a CSV file from your existing store by following the steps listed in the Export section below and then replace existing product data with information for new products.
2. Import CSV File Into Store
Open your WordPress dashboard, navigate to Tools → Import → WooCommerce Products (CSV), and hit the Run Import button.
Upload the CSV file. Next, in most cases, WooCommerce automatically tries to map the data from the CSV file against product fields in your store. We recommend reviewing the mapped data and making necessary changes using the dropdown menu.
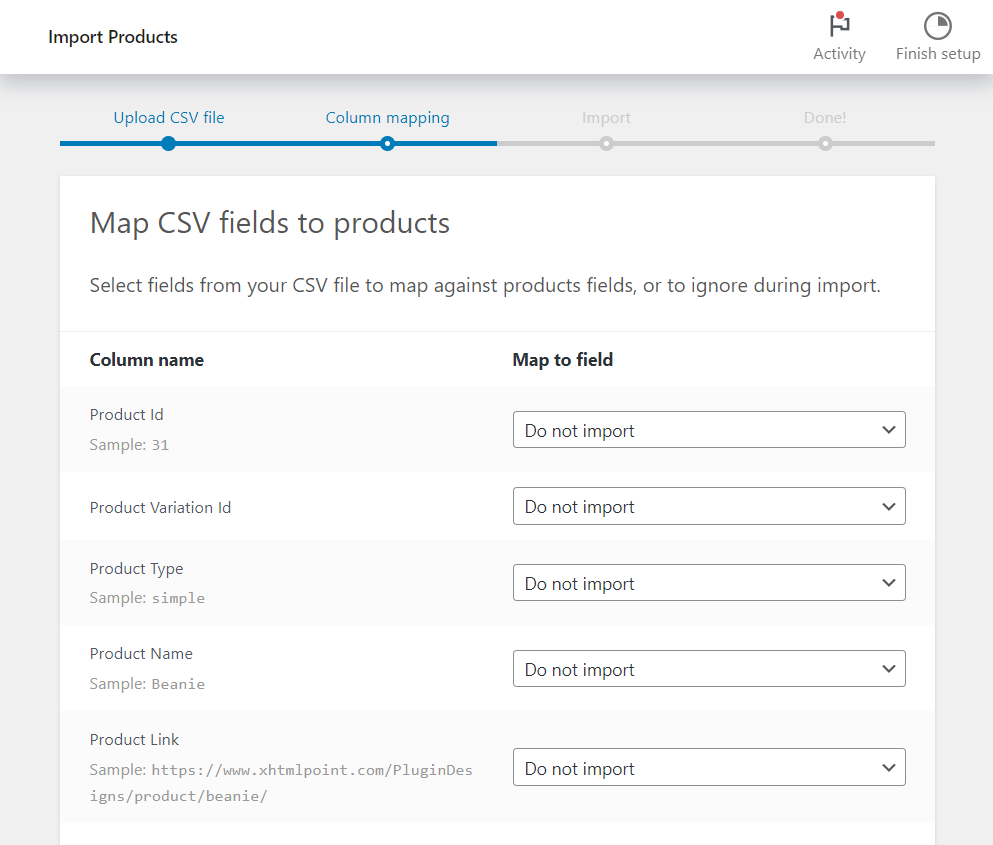
Hit the Run the Importer button and the products will be imported into your WooCommerce store.
Export Products in XML File
To export products using the default WooCommerce import-export feature you need to take the following steps:
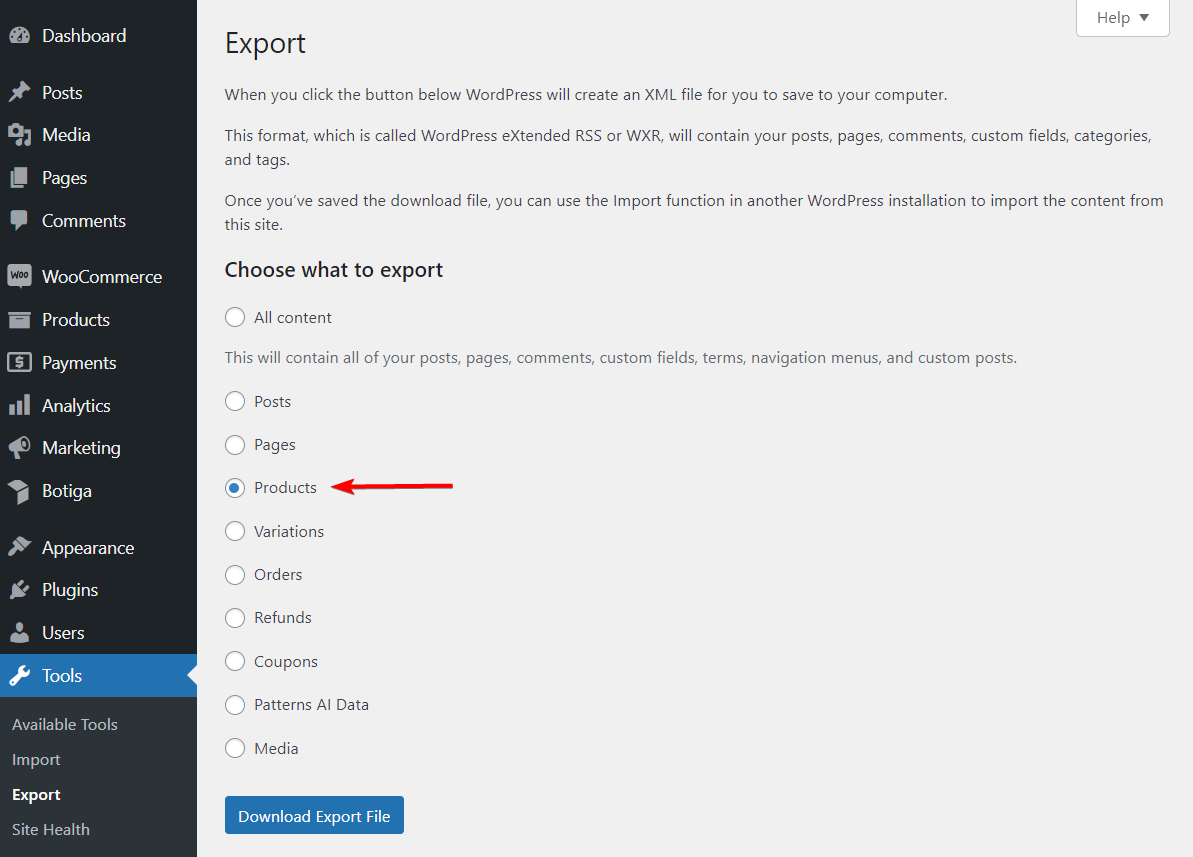
On your WordPress dashboard, go to Tools → Export, select Products, and hit the Download Export File button. All your store products will be downloaded in an XML file.
Import Export WooCommerce Products in Google Sheets
To import and export WooCommerce products into Google Sheets, you need a plugin called WPSyncSheets For WooCommerce.
1. WPSyncSheets For WooCommerce Free vs Premium?
The plugin comes in a free and a premium version. You can export WooCommerce products using the free plugin but to import products, you need the premium plugin that comes at an annual fee of $59 for a single website.
We are using the premium plugin to show how to import and export WooCommerce products but if you need to only export products, feel free to use the free plugin.
Also, you might consider using the free plugin first before purchasing the premium plugin.
2. Install & Activate WPSyncSheets For WooCommerce
Download the free plugin from here or purchase the premium plugin from here, and install and activate it on your WooCommerce store by going to Plugins → Add New Plugin → Upload Plugin.
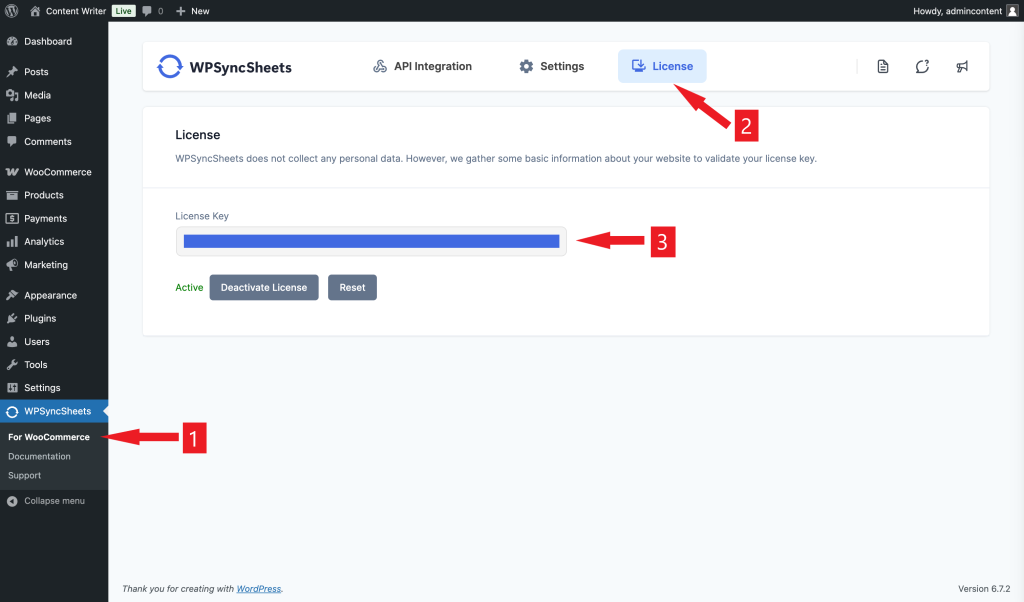
Next, go to By now, you should be able to see a WPSyncSheets option on your WordPress dashboard.
The premium plugin users should navigate to that option, then select For WooCommerce and go to License.
Get your license key from your WPSyncSheets account or the welcome email and add it to your website to activate the premium plugin.
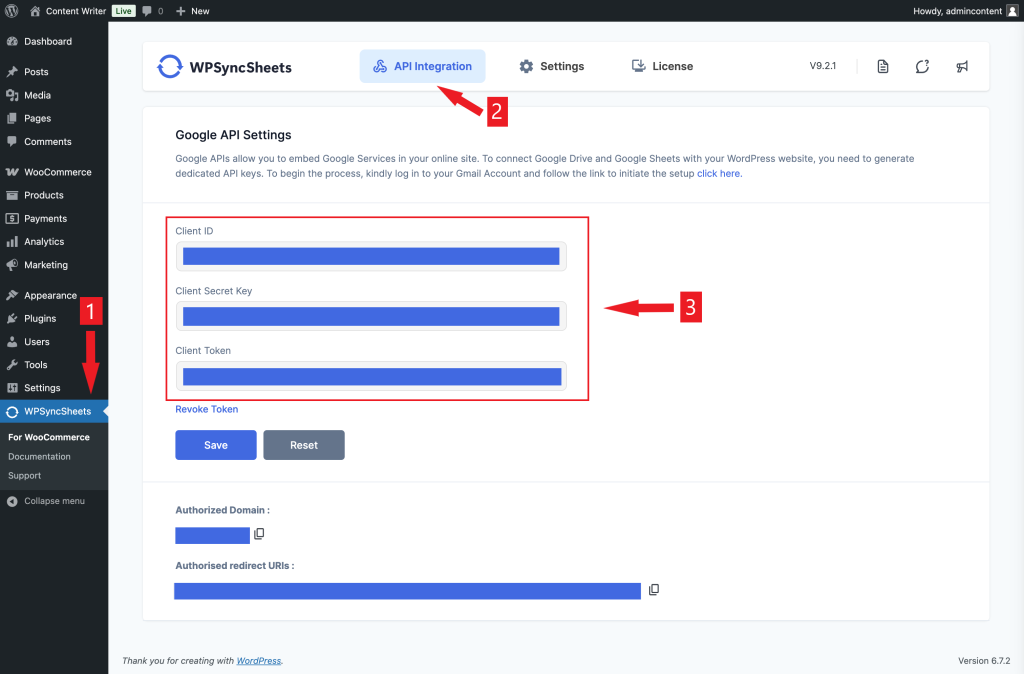
3. Connect WooCommerce Store With Google Drive
In WPSyncSheets For WooCommerce, go to API Integration → Client ID, Client Secret Key, and Client Token.
You can generate this information from your Google Clouds Platform. We have a separate guide on the same.
Adding the Client ID, Client Secret Key, and Client Token to your website will connect your WooCommerce store with your Google Drive which will allow import-export of products into Google Sheets.
Be sure to hit the Save button before moving to the next step.
Import Products From Google Sheets to WooCommerce
To import products from your Google Sheets to your WooCommerce store, you need to ensure that the spreadsheet is properly formatted with specific columns and tabs.
You can download a sample Google Sheets from your store using the WPSyncSheets For WooCommerce plugin. And then add product data to the sample data.
We will show you how to prepare a sample Google Sheets, how to download it to your local computer, and upload (import) it to your local computer.
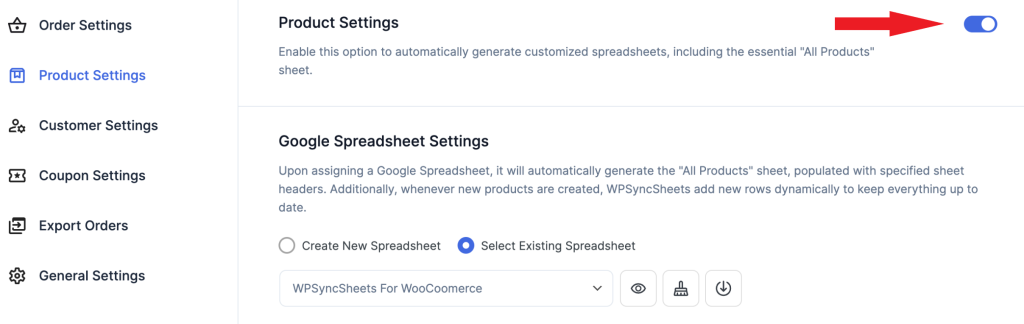
i. Prepare Sample Google Sheets
On WPSyncSheets For WooCommerce, go to Settings → Product Settings and toggle on the Product Settings option.
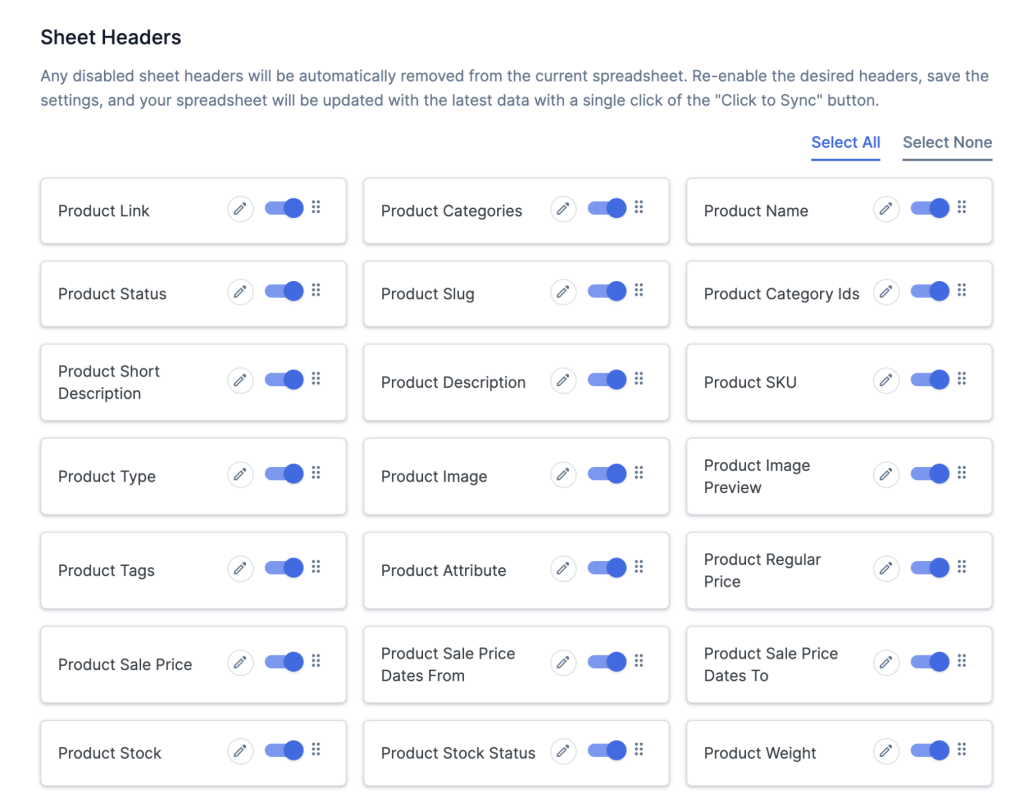
Immediately, numerous options will appear on the Product Settings page. Let’s dive into each option to understand what they offer and how you can modify them to generate sample Google Sheets.
Sheet Headers: Refers to the column titles in the sample Google Sheets.

WPSyncSheets automatically creates these headers, based on your store data. You can remove any headers from appearing in the sample sheet by de-selecting them.
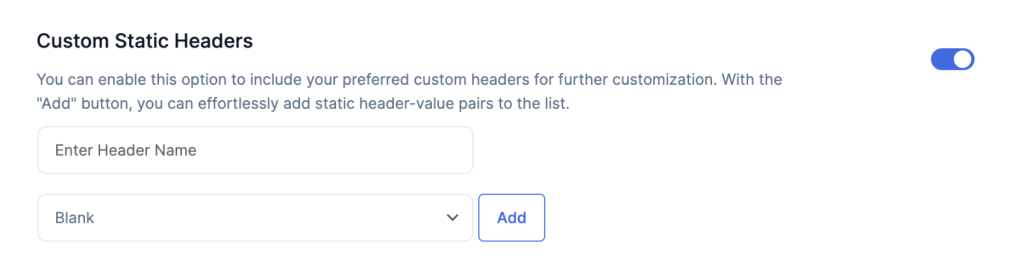
You can add customer headers to the sample sheet by using the Custom Static Headers option.
IMPORTANT: You need to add three new sheet headers: Insert, Update, and Delete.
You will use the columns under these headers to add products, update product data, and delete existing product data from your store.
This means you don’t have to replace all information in the sample sheet to add products to your store. These 3 dedicated columns will help you add new products and update existing product data.
DO NOT add the new columns or sheet headers using the Custom Static Headers option.
Scroll down to the Import Products option, and toggle it on. Immediately, the Insert, Update, and Delete options will appear, toggle them on as well.
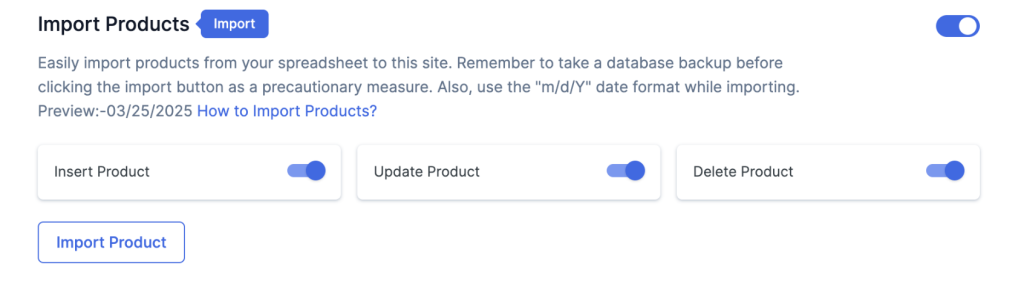
The new sheet headers will be added to the Sheet Header section.
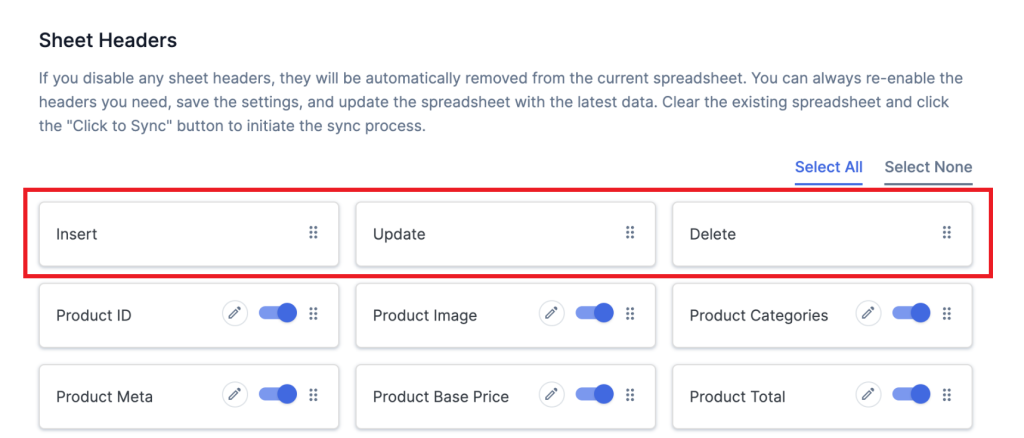
Later, when you download the sample sheet, the Insert, Update, and Delete headers will appear on the sheet.

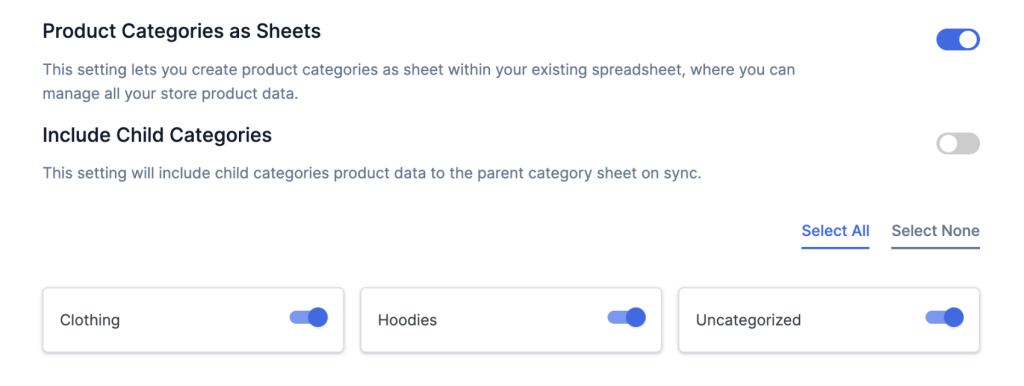
Product Categories as Sheets: Enabling this will create extra columns or sheet headers in the sample spreadsheet based on your store’s existing product categories.
Sync Products: This allows you to sync existing product data to the sample Google Sheets you are about to generate in the next step. You can choose to sync all product data or the products added to your store in a specific period.

Import Product Attributes: Product Attribute refers to data such as color, size, material used
Sync Attributes, among other things. Enabling the Import Product Attributes option will add a column or header to the sample Google Sheets. It will contain data from the products in your store.

That’s all you need to do to prepare the sample Google Sheets for now. Hit the Save button before proceeding to the next step.
ii. Open Sample Google Sheets & Make Modifications
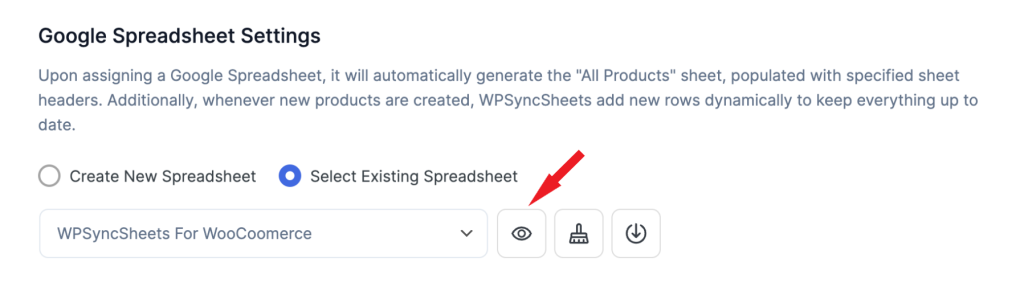
First, you need to generate the sample Google Sheets by going to Google Spreadsheet Settings → Create New Spreadsheet, add a name, and hit enter.
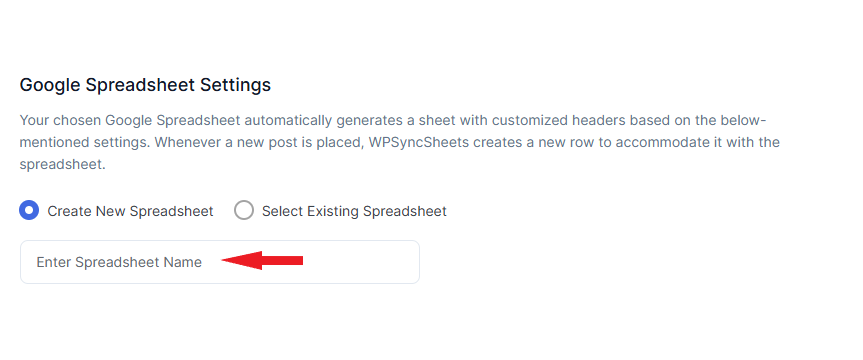
Then go to Select Existing Spreadsheet from the dropdown menu and hit the eye button to open the sample spreadsheet in a new tab.
Now, that the sample Google Sheets is read, you need to add the new product data that will be imported into your store in the next step.
IMPORTANT: Use the Insert columns to add new products, Update columns to update product information, and the Delete column to remove existing product data. We have a separate guide explaining how to do that. Please follow that.
When the spreadsheet is ready for import, proceed to the next step.
iii. Import Products to WooCommerce Store
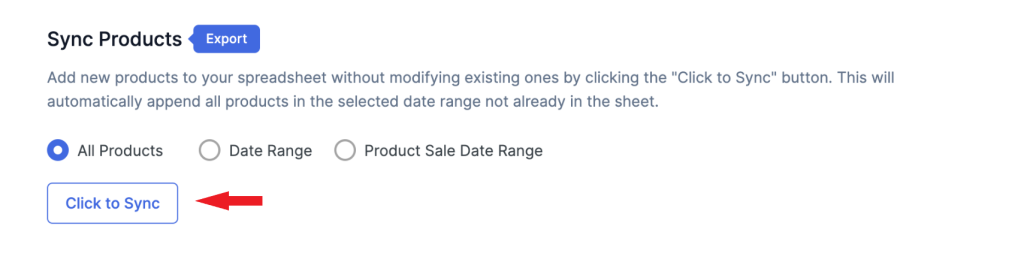
To import the Google Sheets where you added the new products, go to Sync Products and hit the Click to Sync button.
The new products (along with any modifications to existing products and instructions to delete products) will be added to the store.
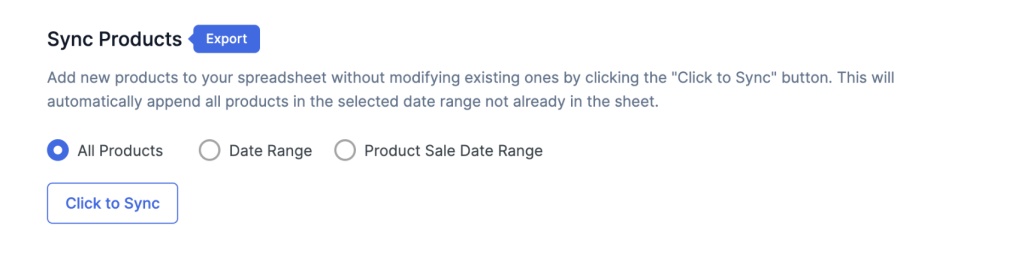
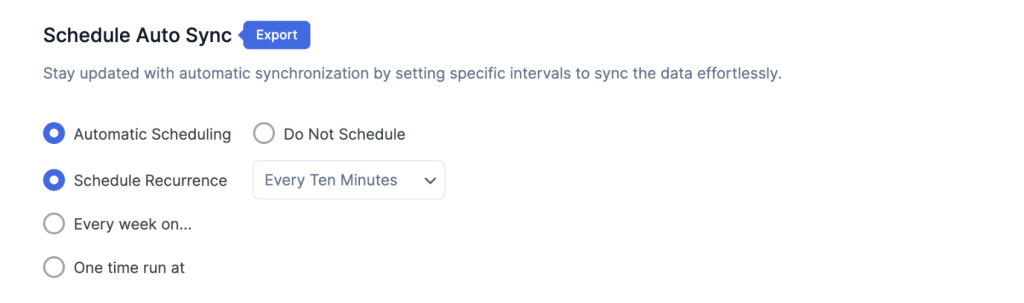
You can add more products to the spreadsheet in the future and set automatic syncing of the products to the store using the Schedule Auto Import option.
Export Products From Google Sheets to WooCommerce
To export products from Google Sheets, follow the exact steps you carried out in the import products tutorial.
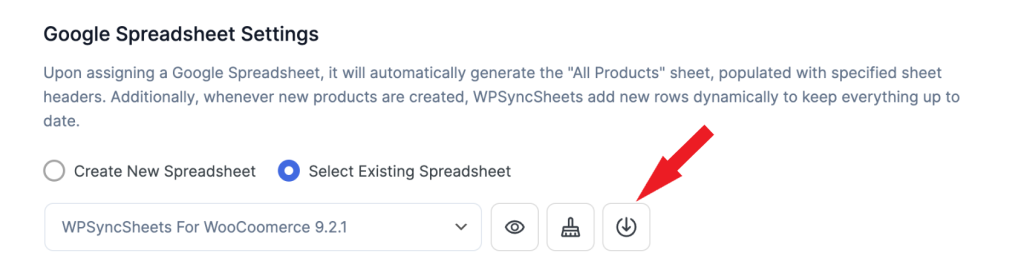
You will first need to prepare the spreadsheets to ensure that it has the data you require. Open the spreadsheets on a new tab as a way to preview the data. Then generate a new spreadsheet. Hit the Download button to download the spreadsheet into your local computer.
Conclusion
Store owners may want to import or export WooCommerce products for reasons like migration to a new website, bulk updates of existing products, backups, bulk editing or updating of products, analysis, and data-driven report generation, among other things.
WooCommerce has a default import-export feature that migrates products in CSV and XML formats.
To import-export WooCommerce in Google Sheets, however, you require a third-party plugin like WPSyncSheets For WooCommerce. It’s a powerful, user-friendly plugin that can be used to migrate not just products but also orders, customers, coupons, and events.
Get WPSyncSheets For WooCommerce today!
FAQs
How to import bulk products into WooCommerce?
To import bulk products into WooCommerce you need to first prepare a CSV file with sample data from GitHub and replace the sample data with information for your own products. Then go to Tools → Import → WooCommerce Products (CSV), and hit the Run Import button. Upload the CSV file, map the data from the CSV file against product fields in your store and that’s it.
To bulk import products into WooCommerce from Google Sheets, you need a powerful plugin like WPSyncSheets For WooCommerce. Using this plugin, you will prepare Google Sheets with your existing products, add new products to the spreadsheets and then import the modified spreadsheets with the click on a button.
How to export WooCommerce products to another site?
To export WooCommerce products to another site, open your WordPress dashboard, go to Tools → Export, select Products, and hit the Download Export File button. All your store products will be downloaded to your local computer in an XML file. You can then import this file into a new website.
To export WooCommerce products in Google Sheets, you need a powerful plugin like WPSyncSheets For WooCommerce. You will first need to prepare the spreadsheets to ensure that it has the data you require. Open the spreadsheets on a new tab as a way to preview the data. Then generate a new spreadsheet. Hit the Download button to download the spreadsheet into your local computer.
How to download a list of products from WooCommerce?
To download a list of products from WooCommerce to another site, open your WordPress dashboard, go to Tools → Export, select Products, and hit the Download Export File button. All your store products will be downloaded to your local computer in an XML file. You can then import this file into a new website.
To download a list of WooCommerce products in Google Sheets, you need a powerful plugin like WPSyncSheets For WooCommerce. You will first need to prepare the spreadsheets to ensure that it has the data you require. Open the spreadsheets on a new tab as a way to preview the data. Then generate a new spreadsheet. Hit the Download button to download the spreadsheet into your local computer.


